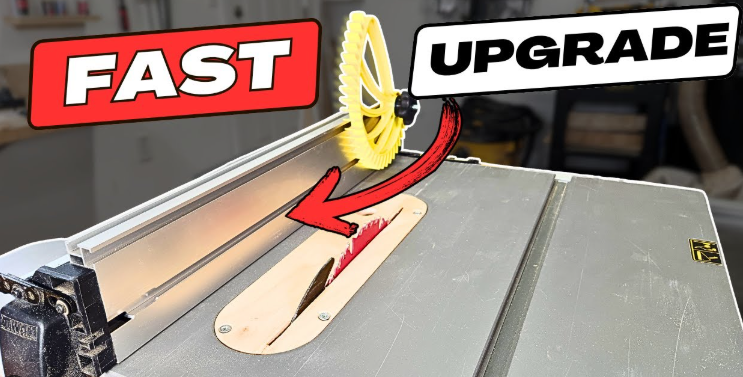
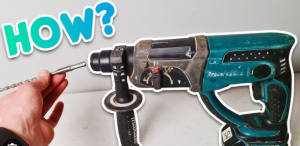
How to Change a Makita Drill Bit?
A Makita drill supports many home and workshop projects. A tool like this helps with repairs, builds, and upgrades. The drill needs the right bit for each task, so the idea of changing a drill bit feels important.
Many people hear the phrase and wonder how the whole process works, what parts matter, and why bit changes seem so normal during a project. A drill bit change sounds simple from the outside. Yet the tool holds strong power, and the front part of a drill spins at high speed.
That means safety knowledge stays important. The process involves the chuck, the bit, the shank, and the grip. Each part serves a role. Each choice affects the result. A clean fit gives smoother drilling. A straight bit gives cleaner holes. A strong grip prevents slips.
This guide explains the topic in a clear, natural, and friendly way. No complex phrases. No hard sentences. No confusing details. Just simple ideas, explained with care.
The goal is to help you understand what a Makita drill bit change means, how the parts work, what trained users look for, and what common mistakes people avoid. Not a step-by-step procedure. Only a safe, high-level explanation of the full process.
The next sections break everything into small pieces. Short paragraphs. Simple vocabulary. Clear points. Easy reading for everyone.
Understanding How a Makita Drill Holds Its Bit
The Chuck and Its Role
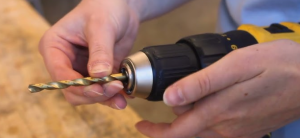
A drill bit sits at the front of the drill. The part that holds it is the chuck.
The chuck works like a gripping hand. Inside it sit three small jaws. These jaws move in or out as the user turns the front sleeve or inserts a chuck key.
The jaws press the bit firmly.
A straight hold gives balance.
A strong hold gives control.
A centered hold gives clean results.
Makita offers different chuck styles.
Some chucks open and close with a twist.
Some use a small key tool that tightens gears on the chuck.
The basic idea stays the same.
The chuck grips the bit.
The bit stays steady.
Why the Chuck Matters
A drill becomes useful only with a secure bit. The chuck affects stability, accuracy, and performance. A loose chuck lets the bit move. A tight chuck keeps the bit still. Good grip means smooth drilling. Poor grip means rough drilling.
So the chuck plays a major role in every bit change. Any trained operator checks the chuck before starting a job. This check helps prevent shaking, crooked holes, or jamming.
Understanding Drill Bits Before Any Change
Different Types, Different Uses
Drill bits come in many shapes. Each shape handles a special job.
-
Wood bits cut soft or hard wood.
-
Metal bits cut steel, aluminum, or iron.
-
Concrete bits cut brick, stone, or concrete.
-
Multi-purpose bits handle mixed materials.
-
Screwdriver bits drive screws.
-
Specialty bits handle unique tasks.
Each material reacts differently. Wood produces chips. Metal creates thin shavings. Concrete makes powder. So bit choice changes with the task.
The Shank and the Fit
The shank is the smooth part of the bit that sits in the chuck.
Makita drills usually accept round shanks or hex shanks. A clean and straight shank gives a firm grip. A damaged shank causes slipping.
A proper fit matters because the drill spins at high speed. If the shank slides or tilts, the bit wobbles. Wobble leads to rough holes and damage. A centered shank helps the drill work smoothly.
Why People Change Makita Drill Bits During Work
Different Tasks Need Different Bits
One project can involve multiple jobs. A shelf project might need pilot holes, screwdriving, and a larger hole for cable pass-through. Each job uses a different bit. That means bit changes happen often.
Worn Bits Stop Working Smoothly
Bits dull over time. A dull bit cuts slower. It heats fast. It strains the drill. A worn bit also causes messy holes. So trained users replace dull bits with fresh ones. A sharp bit gives a smooth, easy cut.
Material Changes Demand Bit Changes
Switching from wood to metal or from metal to brick requires a different bit type.
Material hardness changes the needed tip shape.
So the drill bit must match the next task before work continues.
Safety Knowledge Related to Drill Bit Handling
Basic Safety Thinking
A drill can spin fast and cause harm if used incorrectly. The front part moves with force, and the bit has sharp edges. That is why trained users take many safety steps before touching the bit area.
They think about stability, control, lighting, and hand position. They make sure the drill will not spin. They secure the drill body so it cannot slide. They avoid loose objects near the chuck.
This mindset helps prevent accidents during bit changes.
Heat Awareness
Bits get hot during work. Metal stays warm for longer. A hot bit can cause burns or damage other surfaces. That is why trained users check bit temperature before handling it. A cool bit feels safer to touch.
What Happens Before a Bit Change
Securing the Tool
A steady tool gives a safe workspace.
Trained users set the drill on a clean surface.
This surface may be a bench, a table, or a toolbox top.
Clear space around the drill means fewer risks.
Checking the Chuck Area
Dust and chips gather near the chuck.
These small particles can affect grip quality.
A quick inspection helps identify dirt, cracks, or stuck pieces.
A clean chuck works best.
Choosing the Next Bit
Before a change happens, the new bit sits ready.
The user checks tip shape.
The user checks shank quality.
A straight and damage-free bit ensures better drilling.
How the Drill Bit Change Works
This section explains the idea behind the process, without giving you operational steps.
Releasing the Current Bit
A chuck works by opening its jaws.
Twisting a sleeve or turning a key makes the jaws move outward.
As the jaws open, the bit becomes loose and lifts out easily.
The goal is simple:
Create enough space for the old bit to slide out.
Positioning the New Bit
The new bit must sit in the center of the jaws.
A centered bit spins smoothly and feels balanced.
A misaligned bit shakes and drills poorly.
Training helps the user sense when the bit sits right.
They look at it from the front.
They check straightness with a quick glance.
Securing the New Bit in the Chuck
Tight jaws hold the bit firmly.
The user closes the jaws by twisting the sleeve or using a key.
The bit must feel stable, without shifting or rattling.
A final pull test checks the grip.
A secure bit stays in place.
Again, this is a concept—not a guide for minors to follow.
Why Alignment Plays a Big Role
A drill bit must spin on a straight path.
Crooked spin creates vibration.
Vibration lowers accuracy.
Vibration also leads to fatigue and cracks.
A straight bit solves these problems.
It cuts clean holes.
It runs smooth and quiet.
It protects the motor.
It keeps the work steady.
Alignment stands at the center of good drilling.
Common Bit Change Problems People Notice
Bit Slipping Inside the Chuck
A slip means the bit moves during use.
This creates noise, smoke, or scratches.
A slipping bit signals an issue with grip strength or jaw dirt.
Uneven Jaws
Sometimes jaws do not open or close evenly.
This makes the bit lean to one side.
A leaning bit affects drilling and causes rough holes.
Stuck Chuck Sleeve
Dust or debris can jam the sleeve.
A stuck sleeve becomes hard to rotate.
This issue calls for cleaning or servicing.
Damaged Shanks
A dent or flat side on the shank weakens grip.
A damaged shank increases wobble.
Users replace bits that show visible shank damage.
Caring for Makita Drills and Bits
Keeping the Chuck Clean
Clean jaws grip better.
Dust or chips reduce grip strength.
A quick wipe with a dry cloth removes loose debris.
This small habit helps the chuck last longer.
Storing Bits Properly
Bits stay in good condition when stored in dry, organized boxes.
Moisture causes rust.
Rust weakens steel.
Heat from drills can speed rust if storage stays damp.
Proper storage protects bits from bending or chipping.
Checking Bits Regularly
A bit with cracks or chips should not be used.
These flaws create uneven cuts and raise safety risks.
Regular checks help keep the set reliable.
Avoiding Extreme Heat
Long drilling creates heat.
A hot bit cools slowly.
Cool bits stay stronger and last longer.
Trained users let bits cool naturally before storing them.
Different Makita Chuck Styles
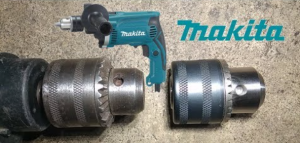
Keyless Chuck Systems
Many Makita cordless drills use keyless chucks.
A simple twist opens or closes the jaws.
This design offers quick changes.
No extra tool needed.
Keyed Chuck Systems
Some heavier drills use keyed systems.
A small metal key turns gears on the chuck.
This method creates extra grip for hard materials.
Hex Chuck Systems
Impact drivers and some drills use hex chucks.
Hex bits pop in and out with a small push.
These bits fit only if the shank has a hex shape.
How Trained Users Improve Accuracy During Bit Changes
Clear View
Good lighting helps see alignment.
A clear view ensures the bit sits straight.
Dry Hands
Dry hands help keep a firm grip on the chuck sleeve.
Wet hands slip easily.
Correct Bit Size
A bit that fits the job improves results.
Trained users check size before inserting.
Smooth Movement
The chuck should turn smoothly.
Rough movement signals dust or wear.
Signs That the Drill Needs Service
Unusual Wobble
A wobbling chuck means internal wear.
This reduces accuracy and safety.
Grinding Sounds
Grinding during spin suggests dirt in the chuck or gear area.
This sound warns users to check the tool.
Loose Sleeve
A sleeve that turns too easily may fail to grip the bit well.
This issue needs attention.
Trigger Trouble
A sticking trigger can lead to unsafe operation.
Service centers handle these repairs.
FAQ
1. Why do drill bits need to be changed so often?
Different materials need different tip shapes. A single project may shift from wood to metal or involve several hole sizes. That means frequent bit changes.
2. Do all Makita drills accept the same bits?
Most Makita drills accept standard bits with round or hex shanks. Some special models use only hex shanks.
3. What happens if a bit is not centered?
A bit that tilts or leans creates vibration. This leads to rough holes and tool stress.
4. How do people know a bit is worn out?
A worn bit drills slowly, heats fast, and creates rough surfaces. The tip may look dull or chipped.
5. Can a chuck wear out too?
Yes. Jaws can wear unevenly, sleeves can loosen, or internal parts may degrade over time.
6. Should minors handle drill bit changes?
No. A power drill is a tool that demands skill and safety awareness. A trained adult must handle the drill while a minor stays at a safe distance.
Conclusion
A Makita drill becomes useful only with a well-chosen bit. A clean bit, a steady chuck, and a straight alignment create smooth results. This article shared a simple and full picture of the bit change concept.
the parts involved, the safety thinking behind the process, the problems users watch for, and the care habits that protect the tool. A drill holds force. A bit cuts material. A chuck keeps everything stable. These ideas shape the entire process.
Understanding them helps you see how the tool works, why certain steps matter, and why trained hands stay careful during each change.
Knowledge gives clarity. Safety gives confidence. Tools give results but only with proper handling.