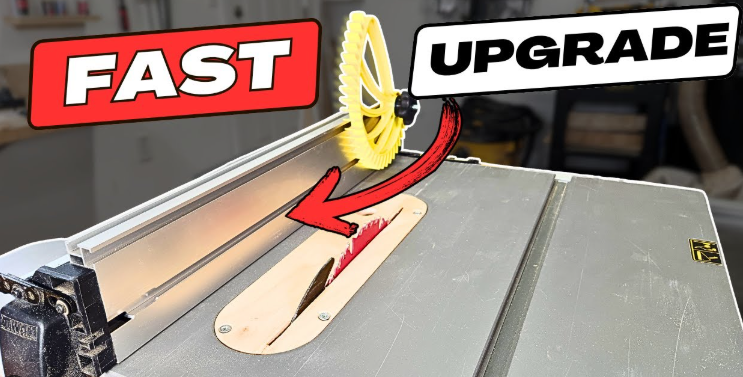
How to Change the Blade on a Ryobi Circular Saw?
A Ryobi circular saw helps you cut wood fast and clean. A sharp blade makes each cut smooth. A dull blade slows the work and makes edges rough. It also puts stress on the motor and raises safety risks.
A simple blade change solves these problems. No advanced skills needed. Just patience. A steady setup. A clear guide.
This article explains everything in a clear, step-by-step way. Short sentences. Easy words. No confusing terms. Great for beginners. Great for non-native speakers. Great for anyone who wants simple, human-like instructions.
Why a Fresh Blade Matters
A good blade changes everything.
Think about it. A dull knife feels slow. A sharp knife feels smooth.
The same idea fits your circular saw.
A fresh blade gives you:
-
Clean cuts
-
Fast cutting speed
-
Less strain on your arms
-
Less heat on the motor
-
Better control
-
Safer handling
A dull blade grabs the wood. It shakes. It smokes. It fights back.
A new blade does the opposite. It glides.
What You Need Before You Start
A smooth blade change starts with the right setup. A few items make the process safer and easier.
Basic Tools
-
Ryobi circular saw
-
Correct replacement blade
-
Blade wrench from the saw
-
Extra cloth for dust
Safety Gear
-
Safety glasses
-
Work gloves
-
Stable work table
Extra Checks
-
Power source removed
-
Good lighting
-
Blade cool
These small details matter. Good light helps you see the bolt. A cool blade protects your hands. A stable table keeps the saw from sliding away during the swap.
Why Blade Direction Matters
Circular saws spin in one direction. The teeth point forward to bite into the wood. A blade installed the wrong way slips across the surface instead of cutting it. The saw struggles. The cut burns. The wood chips in random spots.
So you must match the arrow on the blade with the arrow on the saw guard.
Both arrows must point the same way.
Correct direction makes each cut smooth and controlled.
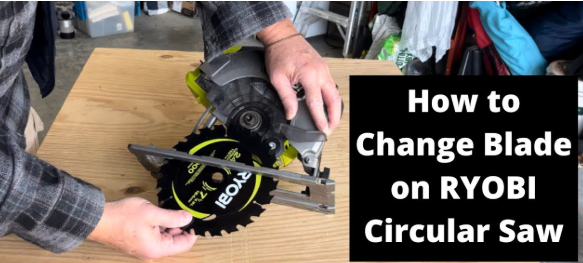
How to Change the Blade on a Ryobi Circular Saw
Step 1: Disconnect All Power Sources
Start with safety.
A saw can start even with a short trigger tap.
A battery bump may wake the motor.
Remove the battery completely.
Or unplug the cord.
Place it far away so you do not touch it by mistake.
This first step protects both hands for the rest of the process.
Step 2: Position the Saw on a Solid Surface
Use a flat table or workbench.
The saw needs stable support.
No tilt. No drop. No sliding.
Turn the saw so the blade faces up.
This angle gives you full access to the bolt, washer, and arbor.
A steady base gives you confidence.
And confidence gives you a smoother blade change.
Step 3: Lift the Lower Blade Guard
Slide the guard up with one hand.
Hold it in place.
Keep all fingers clear of the blade teeth.
The guard tries to close by itself.
So keep a firm grip.
This gives full access to the bolt in the center.
A clear path makes every step easier.
Step 4: Press and Hold the Spindle Lock Button
The spindle lock button prevents the blade from moving.
Ryobi adds this feature to help with safe blade changes.
Press the button.
Hold it down.
Turn the blade gently with your other hand.
Wait for the button to click into place.
The click stops the blade.
Once locked, the bolt will loosen without slipping.
Spindle lock equals full control.
Step 5: Loosen the Arbor Bolt with the Wrench
Use the blade wrench from the saw.
It fits the bolt perfectly.
Turn the bolt counterclockwise.
You may feel slight tension.
Push steadily instead of pushing hard.
Slow pressure works better than fast force.
Once the bolt loosens, use your fingers to remove it fully.
Slide the washer off next.
Place the bolt and washer in a safe spot.
Small parts roll away easily.
Step 6: Take Out the Old Blade
Hold the blade by the inner circle, not the teeth.
Pull it straight out.
Move it slowly.
Old blades still have sharp spots.
A small touch may cause cuts.
Treat the blade with care.
Place the blade aside on the table.
Do not stack it under other tools.
Step 7: Install the New Blade
Before installing, check the blade type.
Wood blades have larger teeth.
Fine blades cut sheets smoothly.
Metal blades use small, dense teeth.
After checking, place the new blade on the arbor.
Match the arrow on the blade with the arrow on the saw guard.
Both must point the same way.
Push the blade in firmly.
Make sure it sits flat against the inner plate.
Correct position delivers clean cuts and steady control.
Step 8: Reinstall the Washer and Bolt
Slide the washer back into place.
Insert the bolt next.
Turn the bolt clockwise with your fingers.
Keep the blade from moving with your other hand.
Turn until the bolt rests snugly against the washer.
Step 9: Tighten the Bolt with the Wrench
Press the spindle lock button again.
Hold it down firmly.
Use the wrench to tighten the bolt.
Turn clockwise with steady force.
Do not use too much strength.
Do not add pliers or extra tools.
A firm fit keeps the blade secure.
An overtightened bolt may damage the threads.
Balance matters.
Step 10: Release the Guard and Test the Saw
Lower the guard slowly.
Make sure it returns to its normal position.
Check if it moves smoothly.
Reconnect the power.
Hold the saw away from any material.
Tap the trigger once.
Let the blade spin freely for one second.
A good blade spins straight.
A bad install wobbles or makes strange notes.
Stop right away if anything looks off.
Extra Tips for Better Performance
Use the Right Blade for Each Job
-
Sharp tooth blade for wood
-
High-tooth blade for smooth sheet cuts
-
Special metal blades for pipes
Correct blades improve speed and reduce strain.
Wipe Dust from the Saw Before Changing Blades
Dust builds around the guard and the bolt.
A clean area helps the blade sit flat.
Check the Blade Edge Each Week
A quick glance helps you catch dull teeth early.
Replacing early protects the motor.
Store Old Blades Safely
Wrap them in a cloth or cardboard.
Sharp edges stay hidden.
This keeps your hands safe during clean-up.
Troubleshooting After Installing a Blade
The blade feels loose
The bolt may not be tight enough.
Press the spindle lock again.
Give the bolt one more firm turn.
The saw vibrates during cuts
The blade may not sit flat.
Remove it.
Clean the base plate.
Reinstall the blade.
The cut looks rough
You may be using the wrong blade.
Pick one with more teeth for smooth finishes.
The motor feels warm too fast
A dull blade adds stress.
Switch to a fresh blade.
FAQs
1. What size blade works best with a Ryobi circular saw?
Most Ryobi models use 7-1/4 inch blades. Check your saw label to confirm.
2. Do I need special tools to change the blade?
You only need the blade wrench that comes with the saw. It fits the bolt perfectly.
3. Why does the bolt turn backward compared to some tools?
The saw design keeps the bolt tight during cutting. The direction prevents loosening while the blade spins.
4. Can I use a blade from another brand?
Yes, as long as the blade fits the correct size and arbor hole. Always check both numbers before buying.
5. What signs show that my blade needs to be replaced?
Burn marks, rough edges, smoke, slow cuts, and loud motor strain all point to a dull blade.
Conclusion
A blade change on a Ryobi circular saw stays simple with clear steps and steady hands. Power off. Guard up. Bolt loose. Old blade out. New blade in. Bolt tight.
Then a short spin test. A sharp blade keeps every cut smooth and safe. The saw runs better. The wood looks cleaner. And each project feels easier. With regular blade checks and simple care, your Ryobi circular saw stays strong for every job.