How to Use a DeWalt Drill?
A DeWalt drill is one of the most useful tools in any home or work area. People use it to drill holes, drive screws, and complete many repair tasks. Many users still feel confused during first use.
Buttons, numbers, and settings may look simple, yet mistakes happen often. A drill can damage wood, strip screws, or cause injury without proper handling. Clear understanding builds confidence.
Proper use improves results. This guide explains every step in detail. Language stays simple. Ideas flow naturally. Each section builds knowledge slowly.
Beginners will feel more comfortable. Regular users will refine skills. Strong results come from correct technique, steady control, and safe habits.
Understanding a DeWalt Drill

What a DeWalt Drill Does
A DeWalt drill spins a bit to drill holes or drive fasteners. Electric power comes from a cord or a battery. Rotation speed changes based on settings and trigger pressure. Torque control helps prevent damage to screws and surfaces. Many models include drilling and driving modes.
Common Types of DeWalt Drills
DeWalt produces several drill types.
-
Cordless drill drivers
-
Cordless hammer drills
-
Corded drills
Cordless models suit home tasks and light jobsite work. Hammer drills help with brick and masonry. Corded drills deliver steady power for long tasks.
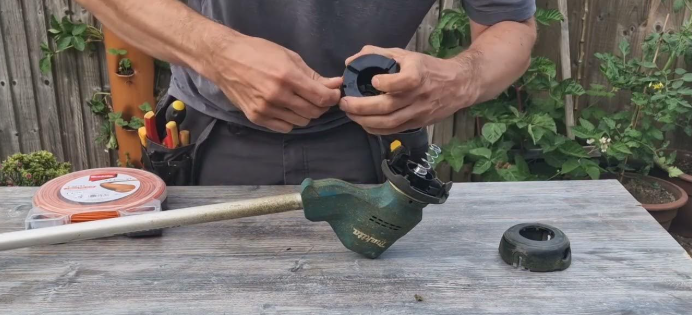
Main Parts of the Drill
Each DeWalt drill includes key parts.
-
Chuck
-
Trigger
-
Forward and reverse switch
-
Torque ring
-
Speed selector
-
Handle and grip
-
Battery or power cord
Knowledge of these parts supports safe operation.
Safety Basics Before Use

Personal Safety Rules
Safety starts with awareness. Eye protection prevents injury from dust and chips. Gloves improve grip but should fit well. Loose clothing causes risk near rotating parts. Stable footing keeps balance during drilling.
Tool Inspection
A quick check avoids problems. The drill body should show no cracks. The chuck should hold bits tight. Batteries should lock in place. Power cords should remain intact.
Work Area Safety
A clean work area improves control. Bright light helps accuracy. Stable surfaces support better drilling. Children and pets should stay away during use.
Getting the Drill Ready
Charging the Battery
A full battery ensures steady power. DeWalt chargers show light signals during charging. The battery should cool before charging after heavy use. Proper storage extends battery life.
Installing the Battery
The battery slides into the base of the handle. A click sound confirms proper fit. Loose batteries reduce performance.
Understanding the Charger Lights
Most DeWalt chargers use color lights.
-
Solid red shows charging
-
Solid green shows full charge
-
Flashing red may signal a hot or cold battery
Reading the manual helps confirm meanings for each model.
Selecting the Right Drill Bit

Drill Bits for Wood
Wood bits feature sharp tips and wide flutes. Spade bits drill large holes. Brad point bits improve accuracy on flat surfaces.
Drill Bits for Metal
Metal bits use hardened steel. Cobalt bits handle tough metals. Lubrication helps during metal drilling.
Drill Bits for Masonry
Masonry bits feature a carbide tip. Hammer drill mode supports brick and concrete work.
Screwdriver Bits
Screwdriver bits match screw heads.
-
Phillips
-
Flat
-
Torx
-
Square
Correct fit prevents stripping.
Installing and Removing Drill Bits
Opening the Chuck
Most DeWalt drills use a keyless chuck. Hands twist the chuck counterclockwise to open. The jaws widen to accept the bit.
Securing the Bit
The bit slides into the chuck center. Hands twist the chuck clockwise until tight. A firm grip ensures secure holding.
Removing the Bit
Hands twist the chuck counterclockwise. The bit slides out easily once loose.
Understanding Drill Settings

Forward and Reverse Control
The forward setting spins clockwise. The reverse setting spins counterclockwise. Reverse helps remove screws and free stuck bits.
Speed Selector Switch
Many DeWalt drills include two speed ranges.
-
Low speed for driving screws
-
High speed for drilling holes
The switch usually sits on top of the drill.
Torque Adjustment Ring
The torque ring controls turning force. Lower numbers suit small screws. Higher numbers suit large screws or drilling. The drill stops turning once torque reaches the set level.
Drill Mode and Hammer Mode
Standard drill mode suits wood and metal. Hammer mode suits masonry. The mode selector ring changes function.
Holding the Drill Correctly
Proper Grip
Hands should grip the handle firmly. The index finger rests on the trigger. The thumb wraps around the grip. Two-hand use adds control for tough tasks.
Body Position
The body should face the work surface. Feet should remain shoulder-width apart. Arms should stay relaxed yet steady.
Maintaining Balance
Balanced stance reduces strain. Sudden movements should be avoided. Smooth pressure improves results.
How to Drill Holes in Wood

Marking the Spot
A pencil mark guides drilling. Accurate marking prevents mistakes. A small dent from a nail helps start the bit.
Starting the Hole
The bit tip should touch the mark. Light trigger pressure starts rotation. Slow speed prevents slipping.
Drilling Through the Wood
Steady pressure keeps the bit moving. Speed can increase once the bit bites. Chips should clear through the flutes.
Finishing the Hole
Pressure should reduce near the exit. Slow finish prevents tear-out. The drill should pull straight out after stopping.
How to Drill Holes in Metal
Preparing the Surface
A center punch creates a starting point. Oil reduces heat and friction. Firm clamping prevents movement.
Selecting Speed
Low speed suits metal drilling. High speed creates heat and dulls bits.
Applying Pressure
Steady pressure helps the bit cut. Excess force causes damage. Chips should appear as small curls.
Cooling the Bit
Short pauses reduce heat. Extra oil helps during thick metal drilling.
How to Drill Holes in Masonry
Using the Right Mode
Hammer mode should be selected. A masonry bit should be installed.
Starting the Hole
Light pressure helps the bit bite. Slow speed reduces wandering.
Drilling the Hole
Firm pressure works with hammer action. Dust should clear often. Short breaks prevent overheating.
Driving Screws with a DeWalt Drill
Selecting the Correct Bit
The bit should match the screw head exactly. Proper fit prevents slipping.
Setting the Torque
Low torque suits soft wood. Medium torque suits hardwood. Testing on scrap wood helps find the right setting.
Driving the Screw
The screw tip should align straight. Slow speed starts the screw. Speed can increase once the screw bites.
Stopping at the Right Depth
The torque clutch stops rotation automatically. Manual release of the trigger adds control.
Removing Screws
Switching to Reverse
The forward and reverse switch should move to reverse. The arrow usually points left.
Applying Pressure
Firm pressure keeps the bit seated. Slow speed prevents stripping.
Handling Stuck Screws
Short bursts help loosen tight screws. A manual screwdriver may assist.
Using the Drill for Common Home Tasks

Hanging Shelves
Accurate marks guide hole placement. Wall anchors support heavy loads. Level checks ensure straight shelves.
Assembling Furniture
Low torque settings protect fasteners. Short bursts improve control. Hand tightening may finish the job.
Installing Curtain Rods
Pilot holes help start screws. Stud finders locate solid mounting points.
Repair Work
Small repairs benefit from light torque. Correct bits prevent damage to old screws.
Using a DeWalt Drill Outdoors
Weather Awareness
Dry conditions improve safety. Wet surfaces increase slip risk. Battery tools should stay dry.
Deck and Fence Work
Pressure-treated wood requires sharp bits. Long screws need low speed and high torque.
Garden Projects
Raised beds and planters need pilot holes. Outdoor screws resist rust.
Drill Maintenance and Care
Cleaning the Drill
Dust should be wiped off after use. Compressed air clears vents. Clean tools last longer.
Battery Care
Batteries should be stored in cool places. Full discharge should be avoided. Regular use keeps batteries healthy.
Bit Maintenance
Dull bits reduce performance. Sharpening or replacement improves results. Bits should be stored dry.
Common Mistakes and How to Avoid Them
Using the Wrong Bit
Wrong bits cause poor holes. Bit selection should match material.
Applying Too Much Force
Excess force damages bits and surfaces. Steady pressure works better.
Ignoring Safety Gear
Eye protection should always be worn. Injuries can occur quickly.
Skipping Practice
Practice builds skill. Scrap material helps test settings.
Tips for Better Results
Practice Control
Slow starts improve accuracy. Speed increases after control improves.
Use Both Hands
Two hands improve stability. Heavy tasks benefit from extra support.
Let the Drill Work
The drill should cut without forcing. Proper settings do most of the work.
Troubleshooting Common Issues
Drill Will Not Start
Battery charge should be checked. Power switch should move freely. Trigger lock may engage.
Bit Slips in Chuck
The chuck should be tightened firmly. Worn jaws may need service.
Overheating
Short breaks reduce heat. Lower speed helps during tough drilling.
Storage and Transport
Safe Storage
The drill should stay in a case or dry shelf. Batteries should be removed during long storage.
Transport Tips
Cases protect tools during travel. Loose bits should be stored separately.
FAQs
What size drill bit should be used for screws?
The bit size should match the screw shank size. Pilot holes should allow the screw to pass without force.
Can a DeWalt drill drill concrete?
A DeWalt hammer drill can drill concrete with a masonry bit. Standard drill mode will struggle.
How long does a DeWalt battery last?
Battery life depends on capacity and task. Light use may last hours. Heavy drilling drains batteries faster.
Should pressure be applied while drilling?
Steady pressure helps cutting. Excess force should be avoided.
How can bit slipping be prevented?
Proper chuck tightening and correct bit size reduce slipping.
Can the drill replace a screwdriver?
A drill can drive screws quickly. Low torque settings prevent damage during driving.
Conclusion
A DeWalt drill supports many daily tasks at home and on worksites. Correct handling improves speed, accuracy, and safety. Each step in this guide builds good habits, from setup to storage.
Small details matter. Proper bit choice, correct speed, and steady pressure reduce errors. These habits also protect the drill and extend its life. Regular practice helps users feel more confident. Simple projects offer a good place to learn control and balance.
Mistakes happen during learning, yet careful work reduces risk. Patience plays a key role. Slow starts, clear marks, and firm grips lead to cleaner results. Safety gear should remain part of every task, no matter the job size.
Long-term care keeps the drill ready for future work. Clean tools perform better. Charged batteries save time. Sharp bits cut faster and smoother. These steps require little effort yet offer strong value.
With clear knowledge and steady use, a DeWalt drill becomes a reliable helper for drilling holes, driving screws, and completing everyday projects with ease.