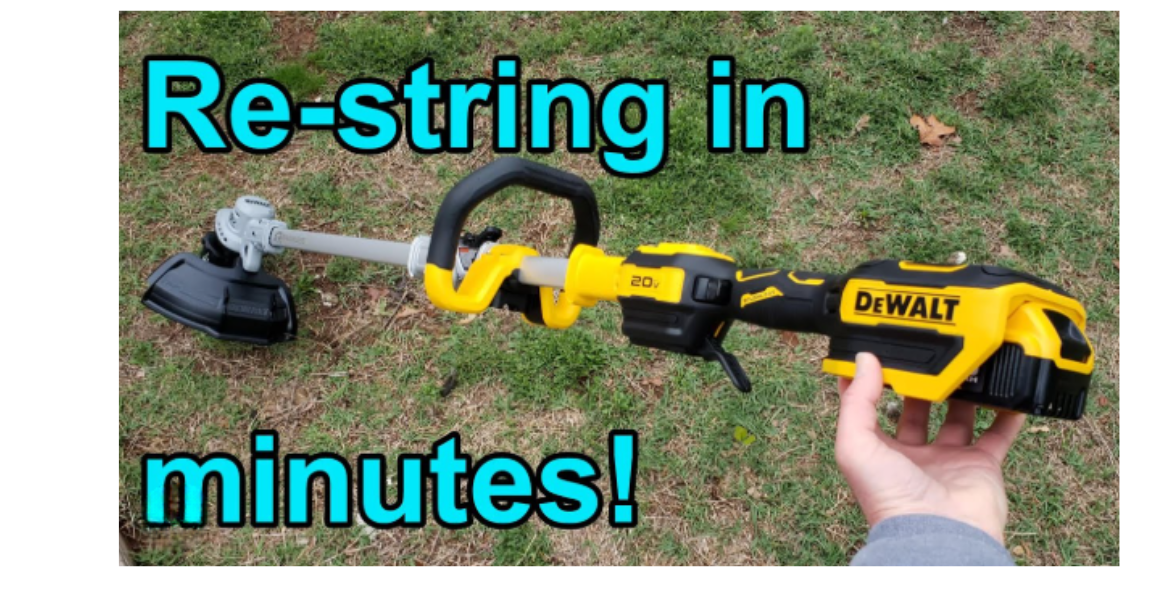
How To Restring A DeWalt Weed Eater?
A DeWalt weed eater keeps grass edges clean and neat. The cutting line does most of the work. That line wears down fast during trimming. Fresh line restores clean cuts and steady power.
Many owners feel unsure about restringing at first. The task looks harder than it is. Clear steps remove the stress. This guide explains how to restring a DeWalt weed eater in simple terms.
Each step uses plain language and short sentences. The method fits beginners and regular users. No special skills are needed. A few tools and calm hands do the job. Careful reading saves time and avoids mistakes.
The article covers manual heads and quick-load heads. Safety tips come first. Line types and sizes get clear attention. Step-by-step instructions follow. Extra tips help prevent jams and breakage. Common problems get easy fixes. The final part answers popular questions and wraps everything up.
Understanding a DeWalt Weed Eater String System
What the Cutting Line Does
The cutting line spins fast. Speed cuts grass and weeds. Thin line handles light grass. Thick line tackles tough growth. A worn line tears grass instead of cutting it. Clean cuts protect the lawn.
The line sits inside the trimmer head. The head feeds line during use. Bump-feed heads release more line after a tap on the ground. Fixed heads need manual adjustment. Quick-load heads make the job easier.
Types of DeWalt Trimmer Heads
DeWalt uses several head styles. Each style loads line in a different way.
Bump-feed heads release line after a ground tap. Manual-feed heads need hand adjustment. Quick-load heads allow simple winding without opening the head. Dual-line heads hold two strings. Single-line heads hold one string.
The owner manual lists the head type. Visual inspection also helps. A bump knob at the bottom signals a bump-feed head. Arrows on the head often mark loading directions.
Why Correct Restringing Matters
Proper restringing keeps balance. Balanced heads reduce vibration. Smooth spinning protects the motor. Correct line length prevents stalling. Wrong size line causes overheating.
Good restringing also saves line. Tangled line wastes time. Even winding avoids jams. Careful setup improves cutting quality.
Safety Steps Before Starting
Power and Battery Safety
Power must stay off during restringing. Corded models need unplugging. Battery models need battery removal. A removed battery prevents accidents.
The switch should stay in the off position. Gloves protect hands from sharp edges. Eye protection helps during test runs.
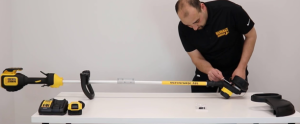
Work Area Setup
A flat surface helps control parts. A clean table keeps pieces visible. Good light helps spot arrows and slots.
Children and pets should stay away. Calm focus prevents mistakes.
Choosing the Right Trimmer Line

Correct Line Size
Each DeWalt model supports specific line sizes. Common sizes include 0.065 inch, 0.080 inch, and 0.095 inch. Thicker line suits dense weeds. Thinner line suits light trimming.
The manual lists supported sizes. The trimmer head also shows size markings. Using the wrong size strains the motor.
Line Shape Options
Round line suits general use. Square line cuts thicker weeds. Twisted line reduces noise. Star-shaped line offers sharp edges.
Beginners should start with round line. Round line feeds smoothly and resists tangles.
Line Length Basics
Each head needs a set length. Dual-line heads need equal lengths. Uneven lengths cause vibration. Balanced winding matters.
Most heads use 10 to 20 feet total. The manual gives exact numbers.
Tools Needed for Restringing
Few tools handle the job.
A new trimmer line spool or bulk line works. Gloves protect hands. Scissors or a cutter trims ends. A cloth wipes dirt.
No power tools are needed. Simple tools keep control high.
How to Restring a DeWalt Weed Eater With a Bump-Feed Head
Step 1: Remove the Trimmer Head Cover
The trimmer head cover locks in place. Tabs or buttons hold it. Press tabs inward. Twist the cover if needed.
The cover lifts off after release. Place it aside carefully. Springs may sit inside.
Step 2: Remove Old Line and Clean the Head
Old line pulls out by hand. Tangled pieces may need cutting. Dirt and grass build up inside.
A cloth wipes the inside clean. Clean parts reduce future jams.
Step 3: Prepare the New Line
Cut two equal lengths for dual-line heads. Each length often measures 8 to 10 feet. Single-line heads need one longer piece.
Straight ends feed easier. Avoid sharp bends.
Step 4: Insert Line Into the Head
Small holes or slots mark entry points. Push one line end into a hole. Feed until the line shows on the other side.
Repeat for the second line on dual-line heads. Both lines should stick out evenly.
Step 5: Wind the Line Correctly
Arrows on the spool show winding direction. Turn the spool to wind. Keep tension steady.
Loose winding causes jams. Tight winding feeds better. Stop winding when about 6 inches remains on each side.
Step 6: Reassemble the Head
Place the spool back inside. Align grooves with slots. Replace the spring if present.
Snap the cover back on. Listen for clicks. The head should feel secure.
How to Restring a DeWalt Quick-Load Head

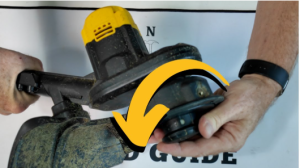
Step 1: Align the Loading Arrows
Quick-load heads show arrows on the top. Turn the head until arrows line up.
Aligned arrows open the internal channel.
Step 2: Feed the Line Through
Push the line through one side. Pull until equal length appears on both sides. No head removal is needed.
Step 3: Wind Using the Knob
Turn the knob in the arrow direction. The head pulls the line inside. Maintain light tension.
Stop winding when about 6 inches remains on each side.
Step 4: Check the Line Balance
Both sides should match length. Adjust by pulling shorter side gently.
Quick-load heads save time and reduce mess.
How to Restring a Fixed-Line DeWalt Head
Step 1: Remove the Head Cover
Fixed heads often use screws. A screwdriver loosens them.
Lift the cover gently.
Step 2: Replace Pre-Cut Lines
Fixed heads often use pre-cut segments. Insert each piece into its slot.
Push until secure. No winding is required.
Step 3: Reattach the Cover
Place the cover back. Tighten screws firmly. Avoid over-tightening.
Testing the Weed Eater After Restringing
Initial Inspection
Line ends should extend evenly. The head should spin freely by hand. Loose parts need tightening.
Power Test
Reinstall the battery or plug in. Start the trimmer at low speed. Listen for smooth spinning.
Light tapping releases more line on bump-feed heads. Cutting a small patch tests performance.
Common Mistakes and How to Avoid Them
Using the Wrong Line Size
Wrong size line strains the motor. Always check markings. Proper size ensures smooth feeding.
Overfilling the Head
Too much line causes jams. Stick to recommended length. Less line feeds better.
Winding in the Wrong Direction
Wrong winding direction prevents feeding. Arrows guide direction. Follow them carefully.
Uneven Line Length
Uneven line causes vibration. Measure carefully. Balance improves comfort.
Maintenance Tips for Longer Line Life
Cleaning After Use
Grass sap builds inside the head. Regular cleaning prevents sticking. A quick wipe helps.
Proper Storage
Dry storage protects line. Moisture weakens nylon. Cool storage keeps line firm.
Inspecting the Head
Cracks or worn springs reduce performance. Early inspection avoids failure.
Troubleshooting Line Feeding Problems
Line Will Not Feed
Blocked channels cause feeding issues. Cleaning solves most cases. Correct winding direction also helps.
Line Breaks Too Fast
Hard surfaces wear line quickly. Edging against concrete shortens life. Slower speed reduces breakage.
Head Vibrates During Use
Uneven line length causes vibration. Rebalance the line. Check for damaged parts.
Extra Tips for First-Time Users
Patience helps during first attempts. Practice improves speed. Reading head markings reduces errors.
A calm pace prevents mistakes. Simple steps lead to success.
FAQs
How often should a DeWalt weed eater be restrung?
Most users restring after several trimming sessions. Heavy use shortens life. Visual inspection shows wear.
Can thicker line improve cutting power?
Thicker line cuts tougher weeds. Motors handle only approved sizes. Correct size protects the tool.
Why does the line keep tangling inside the head?
Loose winding causes tangles. Tight and even winding prevents jams.
Does line shape affect performance?
Line shape changes cutting style. Round line suits general trimming. Square line suits tough weeds.
Can bulk line replace pre-wound spools?
Bulk line works with many heads. Proper size and length matter.
What causes uneven cutting?
Uneven line length causes imbalance. Balanced winding restores clean cuts.
Conclusion
Restringing a DeWalt weed eater feels confusing at first, yet the process becomes simple with clear steps and patience. Proper line replacement keeps the trimmer working the right way. Sharp line cuts grass cleanly instead of tearing it. Clean cuts support healthier lawn edges and better overall results.
Correct restringing also protects the motor. Balanced line reduces vibration and strain. Smooth feeding helps the head spin freely. The tool lasts longer with fewer issues. Small care steps prevent bigger problems later.
Line size, winding direction, and even tension all matter. Each detail plays a role in steady performance. Rushing the process often leads to tangles or feeding trouble. A calm approach saves time in the long run.
Regular inspection keeps the trimmer ready for work. Wiping dirt from the head prevents jams. Proper storage protects the line from damage. These habits take only a few minutes.
Confidence grows after the first successful restring. The task soon feels routine instead of stressful. A well-maintained weed eater delivers clean edges, smooth trimming, and steady power. Simple care leads to reliable results every time.