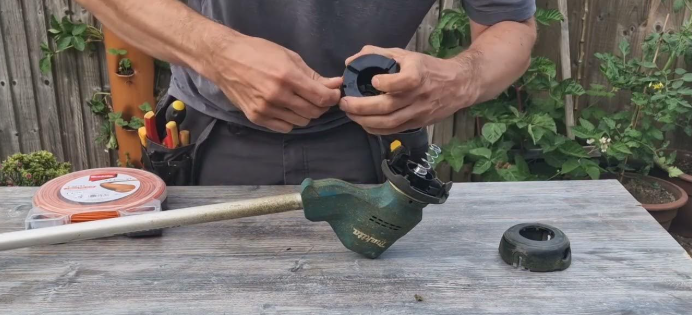
How To Restring Makita Weed Wacker
A Makita weed wacker clears grass fast. Tight spots. Fence lines. Curved edges. Garden borders. This tool keeps yards clean without extra effort. Strong trimming power makes grass care easier and smoother.
Many people feel unsure about restringing the head. The process looks confusing at first. Small parts. Tight spaces. Fast movement. A bit of guidance makes it simple. One clear method works for almost all Makita string trimmers.
This full guide explains the process in simple words. No complex steps. No confusing sentences. Every step stays direct and easy. You learn how to remove the spool, place fresh line, wind it correctly, and secure the line without stress.
This guide works for most Makita models, including cordless trimmers like LXT models and corded versions. Every section focuses on real use. Real steps. Real problems. Real fixes. Nothing extra. Nothing unclear. Just plain, simple guidance that feels natural to follow.
Why Your Makita Weed Wacker Needs New Line
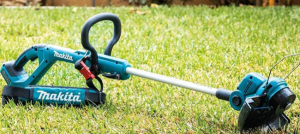
A weed wacker cuts grass with nylon line. This line wears down as it hits dirt, rocks, and walls. A fresh line cuts clean. A worn line tears grass and slows the trimmer. Strong trimming power depends on clear, fresh string.
Makita weed wackers use bump-feed heads or automatic heads. Both types need the same thing: a new line once the old one runs short. You load the line onto the spool. The spool feeds line out as you bump the head on the ground.
New line helps:
• Cleaner cuts
• Less strain on the motor
• Better control
• Faster trimming
• Longer tool life
Fresh string gives smooth results even in thick grass.
Safety Steps Before You Start
Turn Off the Tool
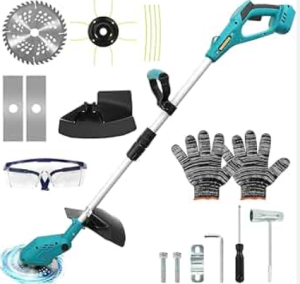
A weed wacker spins fast. The head must stay still before you work on it. Remove the battery on cordless models. Unplug the cord on electric models. You want zero movement during the process.
Wear Basic Safety Gear
Even simple steps need safety. Wear gloves. They protect your fingers from sharp edges on the spool. Wear eye protection. Small dirt or old line pieces may fall out.
Work on a Clean Surface
A clean workspace helps you track all parts. No clutter. No knocked-over items. A flat table works well. Many people use a small bench or an outdoor table. A firm surface keeps the spool steady during winding.
Know Your Makita Trimmer Head
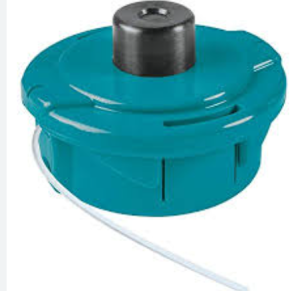
Makita uses easy, common designs. Most come with a bump-feed head. This type releases more string when you bump the head on the ground.
Main parts:
• Spool
• Spool cover
• Eyelets (holes where line exits)
• Center post
• Bump knob
• Spring (in some models)
Each part has a job. The spool holds the line. The cover locks it in. The eyelets guide the line out. The bump knob releases more line when needed.
A few minutes looking at the head helps you understand what each part does. This makes the restring process simple.
Best Line Size for Makita Weed Wackers
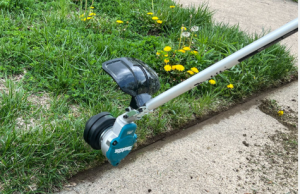
Most Makita models use:
• 0.080-inch (2.0 mm) line for general trimming
• 0.095-inch (2.4 mm) line for tougher grass
Thicker line gives more strength but adds more load on the motor. Thin line cuts lighter grass smoothly.
Round line works for most jobs. Twisted line cuts cleaner and lasts longer in thick areas. Square line cuts sharp but breaks faster on hard surfaces.
Choose the line that matches your yard. Soft grass needs standard line. Thick weeds need stronger line.
How to Remove the Trimmer Head Cover
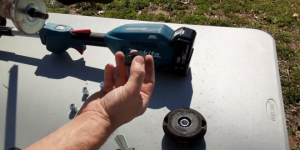
This step starts the process.
Steps to Remove the Cover
-
Hold the head firmly.
-
Press the release tabs on the sides.
-
Pull the cover straight off.
-
Set it aside in a safe place.
Some Makita heads use a twist-lock system. You twist the cover counterclockwise to open it. The tabs or twist mechanism always sit on the outer rim.
Check for dirt inside the head. Small bits may gather. Clean them before moving on.
How to Remove the Old Line
The old line sits inside the spool. Some trimmer heads keep only short pieces left. Others hold long sections that need removal.
Lift the spool out of the head with your fingers. The spool pops out easily since Makita uses simple locking points.
Pull the remaining line out of the eyelets. Throw away old pieces. Old line turns brittle and breaks fast. Fresh line always works better.
How to Prepare the New Trimmer Line
Cut a long piece of line. Most Makita trimmers use 10 to 15 feet of line per reload. Longer line overloads the spool. Short line runs out early.
Straighten the line. Fresh line sometimes stays curled. Straight line winds smoother and stays tight on the spool.
Find the Arrow Direction on the Spool
Every Makita spool has arrows printed on the top. These arrows show the correct winding direction. Follow these arrows exactly. Wrong direction creates tangles and feeding problems.
The spool usually has two separate channels or one large center channel. Both follow the same arrow.
How to Wind the Line onto the Spool
This part matters the most. Good winding keeps line feeding smooth.
Steps to Wind the Line
-
Insert one end of the line into the anchor hole.
-
Pull the line until it locks in place.
-
Wind the line tightly in the direction of the arrows.
-
Stack each loop neatly next to the last loop.
-
Avoid crossing lines.
-
Leave about 6 inches of free line at the end.
Neat winding gives perfect feeding. Messy winding makes the line jam.
Keep the tension tight as you wrap. Loose line creates gaps on the spool.
How to Load Double-Line Makita Spools
Some Makita spools use two lines instead of one. Each side holds one piece.
Steps for Two-Line Systems
-
Cut two equal pieces of line.
-
Insert each piece into its own anchor hole.
-
Wind each one on its own side of the spool.
-
Keep both sides tight and even.
-
Leave equal free length on both ends.
Both lines must match in length. Uneven line creates vibration and makes cutting rough.
How to Thread Line Through the Eyelets
With the spool loaded, the line must pass through the two exit holes in the head.
Steps to Thread the Line
-
Hold the spool near the head.
-
Insert each free end through an eyelet.
-
Pull the lines through until the spool sits flat inside.
-
Keep tension as you work.
The eyelets guide the line outward. If the lines tangle, pull them back out and straighten them. Clean feed prevents jams during trimming.
How to Reattach the Cover
Place the cover back on the head. Align the tabs with the slots. Push the cover until it clicks. Twist-lock models require a quick clockwise twist to lock.
Make sure the cover sits tight. Loose covers fall off during use.
How to Test the Line Before Trimming
Hold both free ends of the line. Pull them outward. The line should move freely without snagging.
Spin the head by hand. Make sure nothing rubs or catches. Smooth movement means correct winding.
Install the battery or plug the tool back in. Start the trimmer and tap the bump knob lightly. The line should extend smoothly.
If the line does not feed:
• Open the head and check the winding
• Remove tangles
• Ensure both ends sit correctly in the eyelets
• Reload if needed
How to Trim Grass Without Wasting Line
Good trimming habits save a lot of line. A weed wacker works best with light contact. Gentle swings. Controlled movements. Soft touches against grass.
Hard hits against fences or rocks wear line fast. Sharp corners also damage line. Keep a slight distance from walls and edges to protect the line.
Tall grass needs two passes. Lower the top first. Then trim the base. This avoids pulling too hard on the line.
How to Fix Common Line Problems

Line Breaks Too Fast
Causes:
• Using thin line in tough grass
• Cutting against hard surfaces
• Line rubbing against concrete
• Cheap line material
Fixes:
• Use thicker line
• Trim at a slight angle
• Avoid rough surfaces
Line Jams Inside the Head
Causes:
• Loose winding
• Wrong winding direction
• Crossing lines
• Overloaded spool
Fixes:
• Follow arrow direction
• Keep loops tight
• Load the right amount of line
Line Does Not Feed
Causes:
• Line too short
• Line melted from friction
• Cover not fully locked
• Spool not seated correctly
Fixes:
• Reload with longer pieces
• Keep lines straight during winding
• Check the cover’s tabs
• Reseat the spool
How to Clean a Makita Weed Wacker Head
Dirt and grass bits collect inside the head. Clean parts work better and feed line smoothly.
Cleaning Steps
-
Remove the cover.
-
Pull out the spool.
-
Brush out dirt.
-
Remove grass packed around the spring.
-
Wipe everything with a dry cloth.
-
Reassemble the head.
Avoid water because moisture weakens the line and can cause parts to rust.
How to Store Your Trimmer After Restringing
Store your trimmer in a dry place. Remove the battery on cordless models. Hang the trimmer on a wall hook or place it flat on a shelf. Keep the head facing upward so the line stays untangled.
If the line sits in heat for too long, it becomes brittle. Cool storage keeps the line fresh.
Extra Tips for Better Line Life
Use the Right Line Shape
Round line lasts longer. Twisted line cuts smoother. Square line cuts sharp but breaks fast.
Cut the Right Amount
Only cut 6 inches beyond the guard width. Longer line reduces power and breaks often.
Trim at Full Speed
The line cuts best at full speed. Slower speed causes snapping.
Keep the Head Down
A low angle trims clean. A high angle tears the grass.
Avoid Pulling the Line Hard
Gentle trimming protects the line and keeps cuts smooth.
FAQs
1. What size line works best for a Makita weed wacker?
Most models use 0.080 or 0.095 line. These sizes handle light and heavy grass well.
2. Why does my line melt inside the spool?
Line melts from friction. Overloaded spools or loose winding cause this issue. Tight winding fixes it.
3. How often should I restring the head?
You restring the head whenever the line becomes short. Most people replace line after each full yard trim.
4. Why does my line break so fast?
Line breaks from hitting hard objects. Slow down near fences and rocks. Stronger line helps too.
5. Can I use any brand of trimmer line?
Yes. Just match the correct size for your Makita model.
6. Why does the line stop feeding?
Jams, loose winding, or short ends cause feeding issues. Reloading the spool usually fixes the problem.
Conclusion
A Makita weed wacker works best with a fresh, well-loaded line. The restring process looks tricky the first time, but the steps stay simple and clear once you understand the spool and the winding direction. Clean winding. Firm tension. Correct length.
These steps keep the line feeding smooth. Fresh line gives clean cuts, steady trimming, and faster work. Good care also keeps the trimmer strong for many seasons. With the right method, restringing becomes easy and quick, and your yard looks clean each time you trim.