
How To Use Dewalt Stud Finder
Walls look flat and solid. Many people trust what they see. Inside the wall, many things exist. Wood supports the wall. Metal frames hold structure. Wires carry power. Pipes move water. None of these show on the surface.
Drilling without checking causes problems. A screw may miss support. A drill bit may hit a wire. A pipe may break. Repairs cost money. Injuries may happen.
A DeWalt stud finder helps avoid these risks. The tool shows where solid support exists. The tool warns about danger zones. Correct use improves safety and results.
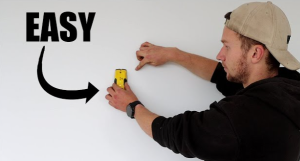
Many people buy a stud finder and still make mistakes. The reason stays simple. The tool works only when used correctly. This guide explains everything slowly. Each idea builds on the last. No step gets skipped.
This article teaches real use. No theory talk. No confusing words. Just clear guidance. So let’s deep dive into How To Use Dewalt Stud Finder.
What a Stud Really Is

A stud is a vertical support inside a wall. Studs connect the floor to the ceiling. Drywall attaches to studs with nails or screws.
Most homes use wood studs. Some buildings use metal studs. Studs stay evenly spaced.
Studs carry weight. Drywall does not. Drywall cracks under pressure. Screws loosen in drywall. Anchors help but still fail under load.
Studs hold shelves straight. Studs keep cabinets firm. Studs support TVs and heavy items.
Finding studs matters even for small jobs.
Why Small Projects Still Need Studs
A picture frame looks light. A towel rack feels harmless. Over time, weight adds stress. Pull force increases. Screws loosen slowly.
Drywall damage starts small. Cracks form. Holes widen. Mounts fail without warning.
Stud placement prevents slow failure. Correct mounting keeps items safe long term.
What a DeWalt Stud Finder Detects
A DeWalt stud finder does not see through walls. The tool senses changes in density.
Drywall feels hollow. Wood feels solid. Metal feels very solid.
Some models detect live electrical current. This feature warns users before drilling.
Metal pipes create strong signals. Plastic pipes stay hidden.
Understanding this helps avoid confusion during scanning.
How the Tool Understands the Wall
Sensors inside the tool press against the wall. These sensors measure resistance.
Resistance changes near solid objects. The tool reads these changes.
Microchips process the data. Software converts readings into lights and sounds.
Slow movement allows accurate reading. Fast movement causes missed signals.
Why Calibration Matters So Much
Calibration teaches the tool what empty wall feels like. Without calibration, the tool guesses.
Wrong calibration causes false studs. False studs lead to weak mounting.
Calibration must happen before each scan session.
Skipping calibration ruins accuracy.
Types of DeWalt Stud Finders Explained
Basic Models
Basic models detect wood studs only. These models use lights instead of screens.
One button controls the tool. Simple design helps beginners.
These models suit picture frames and small shelves.
Multi-Scanner Models
Multi-scanner models detect wood, metal, and wires.
Screens show bars and icons. Sounds guide movement.
These models suit most home projects.
Deep Scan Models
Deep scan models detect deeper objects.
Thick drywall blocks signals. Plaster walls reduce accuracy.
Deep scan improves detection in these cases.
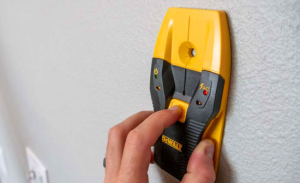
Every Part of a DeWalt Stud Finder Explained in Detail

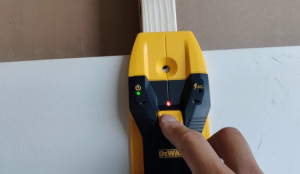
Power Button
The power button starts the tool.
Long press often begins calibration.
Short press may change modes.
Users should not rush this step.
Mode Selection Button
Some models include a separate mode button.
This button switches between wood, metal, and wire detection.
Switch modes only when the tool rests flat.
Display Screen
Screens show bars, arrows, and icons.
Bars rise near dense objects.
Icons warn about wires.
Screens help users understand signals visually.
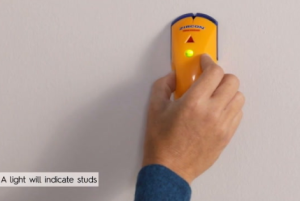
Indicator Lights
Lights glow stronger near studs.
Edge lights show boundaries.
Lights help users mark edges accurately.
Sensor Area
The sensor touches the wall.
Clean contact matters.
Dust blocks signals.
Tape or stickers cause false readings.
Battery Compartment
Batteries power the tool.
Weak batteries cause random alerts.
Fresh batteries improve accuracy.
Preparing the Wall Area Before Scanning
Clear the Wall
Remove frames, hooks, and decorations.
Clear space improves accuracy.
Obstructions confuse sensors.
Clean the Surface
Dust and grease affect readings.
Wipe the wall with a dry cloth.
Clean walls help sensors read correctly.
Check Battery Power
Install fresh batteries.
Weak batteries cause false alerts.
Battery strength affects every reading.
Understanding Wall Types Before Scanning
Drywall
Drywall works best with stud finders.
Signals appear clear.
Slow scanning improves accuracy.
Plaster
Plaster feels thicker.
Signals weaken.
Deep scan mode helps.
Tile
Tile reflects signals.
Scan near grout lines.
Expect slower response.
Brick
Brick blocks signals.
Stud detection rarely works here.
Concrete
Concrete contains rebar.
Metal mode detects rebar only.
Why Hand Position Matters
Grip affects accuracy.
Too much pressure changes readings.
Too little pressure breaks contact.
Light and steady pressure works best.
Finger placement matters.
Covering the sensor blocks signals.
Correct Way to Hold the Stud Finder
Grip the tool firmly.
Place the back flat against the wall.
Avoid tilting.
Move straight and level.
Keep movement smooth.
Why Movement Speed Matters
Fast movement skips data.
Slow movement gathers data.
One inch per second works best.
Rushing causes missed studs.
Patience improves accuracy.
Common Beginner Mistakes Before Scanning
Many users skip preparation.
Many users rush scanning.
Many users ignore calibration.
These mistakes cause false results.
Understanding mistakes prevents frustration.
Setting Real Expectations
Stud finders do not work perfectly every time.
Wall conditions affect accuracy.
Repeated scanning improves confidence.
Verification matters.
Practice builds skill.
Practice Before Real Projects
Practice on known studs.
Garage walls help beginners.
Test scanning from both directions.
Practice builds understanding.
How Scanning Really Works in Practice
Scanning means more than sliding the tool across a wall. Many people misunderstand this part. The tool does not instantly show a stud. The tool collects data as it moves.
Each inch of movement gives new information. The sensor compares the current reading to the last reading. Changes create signals.
Smooth movement gives clean data. Jerky movement causes confusion. Stopping too often breaks the scan flow.
Understanding this helps users trust the tool.
Starting Position Matters More Than Most People Think
Starting too close to corners causes errors. Corners contain framing. Density stays high near edges. The tool may think the whole wall is solid.
Start at least one foot away from corners. Flat open wall works best.
Place the tool flat before powering on.
Calibration Revisited in Real Scanning Situations
Calibration sets the zero point. Zero means hollow wall.
Calibration should happen on a spot with no studs. Many users calibrate directly over a stud by mistake.
Calibrating over a stud causes the entire wall to feel hollow to the tool. This leads to missed detection.
Calibrate again if readings feel strange.
Exact Step-by-Step Scanning Method
Step 1: Tool Placement
Place the stud finder flat on the wall. Keep the sensor fully touching the surface.
Do not tilt. Do not rock the tool.
Step 2: Power and Calibration
Press and hold the power button. Hold still. Wait for the tool to finish calibration.
Release the button only after signals stabilize.
Step 3: Begin Horizontal Movement
Slide the tool sideways. Use slow and steady motion.
One inch per second works best.
Avoid stopping unless marking edges.
How to Read Rising Signals
As the tool approaches a stud, signals increase.
Bars rise slowly. Lights glow stronger. Beeps speed up.
This means density increases.
Keep moving. Do not stop too early.
Understanding Stud Edge Detection Clearly
Stud finders do not show the full stud at once. The tool finds edges first.
An edge marks where density changes sharply.
The first edge marks the start of the stud.
Stopping at this point helps accuracy.
Mark this spot lightly.
Continuing Past the Stud
After the first edge, keep moving.
Signals stay strong over the stud.
Signals drop after leaving the stud.
This drop marks the second edge.
Mark this point.
Finding the Stud Center Correctly
The stud center sits between the two edges.
Measure the distance between marks.
Mark the middle point.
The center gives strongest support.
Drilling at the center prevents screw slip.
Why Double Scanning Matters
One scan may lie.
Wall inconsistencies exist.
Scanning from the opposite direction confirms accuracy.
Start from the other side.
Find both edges again.
Matching results confirm the stud location.
Understanding False Positives
False positives confuse many users.
Paint thickness causes density changes.
Metal corner beads cause alerts.
Electrical boxes cause density spikes.
Understanding wall construction reduces confusion.
Electrical Boxes and Stud Signals
Electrical boxes often attach to studs.
Scanning near outlets shows mixed signals.
Switch to wire detection mode.
Avoid drilling near strong wire alerts.
Using Wire Detection Mode Properly
Wire detection senses live current.
Alerts sound louder and sharper.
Live wires often run vertically or horizontally.
Avoid drilling near these alerts.
Turn off power if unsure.
Metal Detection Mode Explained Deeply
Metal detection finds steel studs and pipes.
Signals appear stronger than wood signals.
Metal edges feel sharper.
Metal studs feel narrower.
Adjust expectations accordingly.
Scanning Over Insulated Walls
Insulation absorbs signals.
Density changes feel softer.
Scan slower.
Repeat scans help accuracy.
Understanding Stud Width Differences
Wood studs usually measure about 1.5 inches wide.
Metal studs feel thinner.
Edge distance helps identify material type.
Wider spacing suggests wood.
Why Speed Changes Results
Fast scanning misses edges.
Slow scanning gathers detail.
Speed consistency matters more than speed itself.
Steady motion creates stable readings.
Using Pencil Marks Correctly During Scanning
Use light pencil marks.
Avoid heavy lines.
Small dots reduce confusion.
Mark edges clearly but lightly.
Scanning Large Wall Sections
Scan in straight lines.
Keep height consistent.
Avoid drifting up or down.
Horizontal scans work best.
Scanning Vertically and Why It Rarely Helps
Studs run vertically.
Vertical scanning crosses many density changes.
Horizontal scanning gives cleaner data.
Use vertical scans only for confirmation.
Stud Finder Drift Explained
Hands drift during scanning.
Drift changes sensor contact.
Use visual reference points to stay level.
Focus on straight movement.
Temperature and Wall Conditions
Cold walls affect sensor behavior.
Hot walls change resistance.
Room temperature improves accuracy.
Wait before scanning after temperature changes.
Humidity and Its Effects
High humidity affects electronics slightly.
Dry conditions produce better readings.
Avoid scanning wet walls.
Scanning Painted and Textured Walls
Thick paint adds density.
Texture breaks contact.
Scan slower.
Press gently.
Multiple scans help.
Understanding Random Beeping
Random beeping often signals weak batteries.
Recalibration helps.
Cleaning the sensor also helps.
Replace batteries when needed.
When the Tool Finds Nothing
Some walls hide studs deep.
Switch to deep scan mode.
Scan slower.
Repeat scans.
Verify spacing.
Using Stud Spacing to Predict Locations
Once one stud appears, others follow a pattern.
Measure 16 inches from center.
Scan near expected locations.
Prediction saves time.
Real-Life Example: Hanging a Shelf
A shelf needs strong support.
Scan first.
Find stud edges.
Mark center.
Confirm from opposite side.
Drill carefully.
Mount the shelf.
Stable mounting lasts longer.
Real-Life Example: Mounting a TV
TV mounts need precise placement.
Stud spacing matters.
Wire detection matters.
Confirm studs twice.
Use proper anchors.
Safety depends on accuracy.
Common Errors During Scanning
Rushing causes errors.
Skipping calibration causes errors.
Ignoring wire alerts causes danger.
Understanding prevents mistakes.
Why Advanced Situations Need Extra Care
Not all walls behave the same. Some walls hide surprises. Extra framing exists. Pipes cross paths. Electrical lines run in strange ways.
Stud finders still work in these situations. Users need patience and method. Understanding common wall layouts helps avoid mistakes.
This section explains what happens when walls do not act “normal.”
Studs Near Doors Explained Clearly
Doors require strong framing. Extra studs sit near door frames. These studs support weight and movement.
Scanning near doors often shows constant density. This does not mean the wall contains no studs. It means many studs sit close together.
Start scanning at least one foot away from the door frame. Move slowly toward the frame.
Expect stronger and wider signals near doors.
Studs Near Windows Explained Clearly
Windows also need extra framing. Header boards sit above windows. Side studs support the frame.
Scanning near windows shows mixed signals. Density changes appear sudden.
Scan horizontally across the wall, not directly above the window. Avoid scanning directly over the window frame.
Understanding Headers and Blocking
Headers are horizontal boards. Blocking connects studs horizontally.
These parts support weight and add stability.
Stud finders may detect these pieces as short studs. Signals appear strong but narrow.
Use repeated scans to identify true vertical studs.
Why Studs Sometimes Appear Wider Than Normal
Some walls contain doubled studs. Builders add extra studs for strength.
These studs appear wider on scans.
Mark both edges carefully. Measure the width. Wider studs often mean extra support.
Ceilings and Joists Explained Slowly
Ceilings hide joists. Joists act like studs but run horizontally.
Lights, fans, and hooks attach to joists.
Gravity affects tool grip. Holding the tool steady matters more.
Scan slowly. Keep the tool flat.
How to Scan a Ceiling Safely
Stand on a stable surface.
Hold the stud finder firmly.
Start scanning away from fixtures.
Scan perpendicular to joist direction.
Confirm joists with multiple scans.
Joist Spacing Basics
Joists often follow the same spacing as studs.
Sixteen inches spacing appears common.
Measure and predict locations after finding the first joist.
Sloped Ceilings and Accuracy
Sloped ceilings change sensor contact.
Keep the tool flush.
Scan slower.
Repeat scans for confirmation.
Electrical Wires in Advanced Situations
Wires often run vertically from outlets.
Some wires run horizontally between boxes.
Wire detection mode helps identify danger.
Avoid drilling near constant wire alerts.
Pipes and Plumbing Explained Clearly
Pipes often run vertically near bathrooms.
Metal pipes create strong alerts.
Plastic pipes do not.
Scan slowly in plumbing areas.
Avoid drilling near mixed signals.
Stud Finding in Kitchens and Bathrooms
These rooms contain many obstacles.
Cabinets hide framing.
Appliances block access.
Plumbing increases risk.
Scan higher on the wall when possible.
Avoid drilling blindly.
Stud Finding Behind Cabinets
Cabinets attach directly to studs.
Scan above the cabinet line.
Use spacing rules to predict stud placement.
Confirm carefully.
Using Stud Finder Around Fireplaces
Fireplaces contain masonry and metal.
Stud finders struggle here.
Avoid drilling near fireplaces without professional advice.
Understanding Corner Framing
Corners contain multiple studs.
Signals stay high across the area.
Corner scans rarely show clear edges.
Measure from a known stud instead.
Exterior Walls vs Interior Walls
Exterior walls contain insulation.
Signals weaken.
Scan slower.
Deep scan mode helps.
Interior walls provide clearer signals.
Walls with Metal Lath Explained
Older homes use metal lath under plaster.
Stud finders detect metal everywhere.
Metal detection mode confirms this.
Stud finding becomes difficult.
Alternative methods may help.
When Stud Finders Struggle
Some walls block signals.
Thick plaster causes issues.
Dense insulation affects readings.
Stud finders still help but require patience.
Using Repetition to Improve Accuracy
Scan the same area multiple times.
Change direction.
Confirm edges.
Trust repeated results.
Combining Stud Finder Use with Other Clues
Outlets indicate stud locations.
Switch plates often sit beside studs.
Nail pops indicate stud lines.
Baseboards may show nail spacing.
Visual Clues on the Wall
Look for small dents.
Look for paint lines.
These often align with studs.
Sound Test as a Secondary Method
Tap the wall lightly.
Hollow sounds change near studs.
Use this only as confirmation.
Measuring and Mapping Studs
Once a stud appears, mark spacing.
Map the wall.
Planning reduces scanning time later.
Long Wall Scanning Strategy
Start from one known stud.
Measure outward.
Confirm predicted locations.
Efficiency improves with planning.
Common Advanced Mistakes
Ignoring framing patterns.
Trusting one scan.
Drilling too close to alerts.
Understanding reduces risk.
Troubleshooting Deep Problems
Tool reacts everywhere.
Wall material causes this.
Recalibrate.
Change modes.
Scan slower.
When to Stop and Reassess
Repeated confusion signals a problem.
Pause.
Recalibrate.
Change scanning area.
Rushing increases mistakes.
Why Long-Term Care Matters
A stud finder works best when cared for properly. Many users ignore care because the tool feels simple. Small neglect causes accuracy loss over time.
Dust builds up. Batteries weaken. Sensors lose contact quality.
Good care keeps readings stable. Good care extends tool life.
Cleaning the Stud Finder After Use
Dust sticks to the sensor area. Drywall dust causes reading problems.
Wipe the back of the tool with a soft cloth. Do not use water. Do not use spray cleaners.
Clean after every project. Short cleaning prevents long problems.
Battery Care Explained Simply
Batteries power accuracy. Weak batteries cause false alerts.
Replace batteries at the first sign of unstable signals.
Remove batteries during long storage. Battery leaks damage electronics.
Store batteries in a cool, dry place.
Proper Storage Habits
Store the stud finder in a dry area. Moisture harms sensors.
Avoid extreme heat. Avoid freezing temperatures.
Store the tool flat. Avoid pressure on the sensor pad.
Good storage preserves accuracy.
Calibration as Ongoing Maintenance
Calibration does not happen once forever. Calibration resets the tool.
Calibrate before every new scan session.
Calibrate again if signals feel strange.
Calibration fixes many problems instantly.
Understanding Long-Term Accuracy Drift
Electronics age. Sensors change slightly over time.
Repeated recalibration offsets this change.
Slow scanning also reduces drift effects.
Trust repeated scans, not single passes.
Deep Troubleshooting: Tool Beeps Everywhere
This problem frustrates many users.
Common causes include weak batteries, dirty sensors, and calibration errors.
Replace batteries first.
Clean the sensor area.
Recalibrate on a clear wall area.
Scan slower.
Deep Troubleshooting: Tool Finds No Studs
Some walls block signals.
Plaster walls reduce sensitivity.
Insulated walls absorb readings.
Switch to deep scan mode.
Scan slower.
Repeat scans from both directions.
Use spacing rules to predict locations.
Deep Troubleshooting: Constant Wire Alerts
Live wires may run close to the surface.
Switch to wire detection mode.
Confirm alerts by scanning higher or lower.
Avoid drilling in that area.
Turn off power if drilling becomes necessary.
Deep Troubleshooting: Stud Appears Too Wide
Doubled studs cause this issue.
Door and window framing causes this issue.
Measure the width.
Find the center carefully.
Wide studs provide strong support.
Deep Troubleshooting: Signals Change Suddenly
Paint thickness affects readings.
Texture breaks sensor contact.
Scan slower.
Apply steady pressure.
Repeat scans.
When Stud Finders Reach Their Limit
Some walls contain metal lath.
Some walls contain concrete blocks.
Stud finders struggle here.
Alternative methods may help.
Professional inspection may be required.
Beginner Practice Plan
Practice builds confidence.
Start with known walls.
Garage walls often show exposed studs.
Scan near outlets.
Confirm spacing.
Practice marking edges.
Practice center finding.
Repeat often.
Training the Hand and Eye Together
Watch the screen.
Listen to sounds.
Move slowly.
Hand control improves with repetition.
Accuracy increases with patience.
Using Stud Finders for Different Projects
Shelves need center placement.
TV mounts need multiple studs.
Cabinets need level spacing.
Light fixtures need joist detection.
Project planning improves results.
Planning Before Drilling
Plan hole placement first.
Scan the area fully.
Mark studs and alerts.
Review markings.
Drill only after confirmation.
Planning reduces mistakes.
Drilling Safely After Stud Detection
Start drilling slowly.
Feel resistance.
Solid resistance indicates stud contact.
Sudden drop indicates hollow space.
Stop drilling near wire alerts.
Safety Rules That Always Matter
Electricity causes serious injury.
Always respect wire alerts.
Wear eye protection during drilling.
Keep children away from tools.
Store tools safely.
Understanding Personal Limits
Stud finders assist users. They do not replace judgment.
Stop if readings confuse you.
Reassess calmly.
Rushing causes damage.
Patience protects safety.
Using Confidence Without Over trust
Confidence grows with experience.
Over trust causes mistakes.
Double checking improves outcomes.
Trust repeated confirmation.
Real-World Success Comes From Process
Correct preparation improves accuracy.
Correct scanning improves results.
Correct marking improves drilling.
Process matters more than speed.
FAQs
How often should calibration happen?
Calibration should happen before every scan session.
Can a DeWalt stud finder detect plastic pipes?
Plastic pipes do not create strong signals.
Does wall paint affect accuracy?
Thick paint may reduce accuracy slightly.
Can insulation block stud detection?
Insulation reduces signal strength but detection still works with slow scanning.
Should scanning start near outlets?
Outlets often sit beside studs and help prediction.
Can beginners rely on this tool?
Yes, slow scanning and repetition improve reliability.
Final Thoughts
A DeWalt stud finder supports safer and stronger wall work. Correct preparation sets accuracy. Calibration ensures trust. Slow scanning reveals clear results. Repetition confirms placement. Practice builds confidence over time.
Correct use protects walls, tools, and safety. This complete guide explains each step clearly for beginners and non-native readers.