
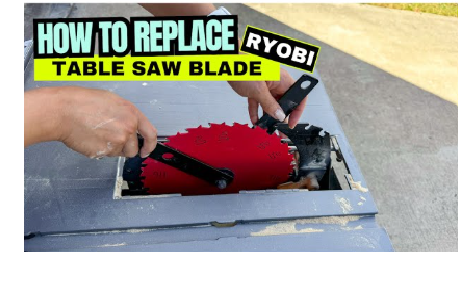
How to Change Blade on Ryobi Table Saw?
Ryobi table saws are popular for home workshops and small woodworking projects. They provide power, accuracy, and versatility. A sharp and proper blade ensures smooth, clean cuts and reduces the risk of accidents.
Over time, the blade can become dull, chipped, or damaged. Replacing the blade is an essential maintenance task that every woodworker must know. This guide explains everything you need to know about changing a Ryobi table saw blade.
Every step is described in detail for beginners. Safety precautions, tools, blade types, and troubleshooting tips are included. Following this guide ensures a safe and smooth blade change.
Why Blade Maintenance Matters on a Table Saw
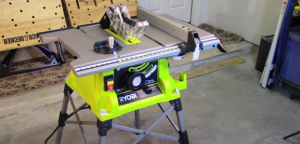
Maintaining the blade is more than a routine task. It affects safety, accuracy, and efficiency.
-
Sharp Blades Improve Accuracy: A dull blade produces rough edges and uneven cuts.
-
Reduces Kickback: Dull or damaged blades increase the chance of kickback, which can be dangerous.
-
Improves Cutting Speed: A sharp blade moves through wood faster, reducing effort.
-
Prolongs Saw Life: Regular maintenance prevents strain on the motor and arbor.
-
Saves Money: Frequent blade replacement prevents damage to expensive materials.
Neglecting the blade can lead to poor results, higher risk of accidents, and damaged wood.
Tools and Supplies Needed to Change a Ryobi Table Saw Blade
Before starting, gather all necessary tools and safety items:
-
Blade Wrench: Usually included with your Ryobi table saw.
-
Gloves: Protect hands from sharp teeth.
-
Screwdriver: Needed if the blade guard or throat plate has screws.
-
Dust Brush or Cloth: For cleaning the arbor and surrounding area.
-
Block of Wood: Optional, to hold the blade in place if there is no spindle lock.
Having everything prepared before starting ensures a smooth process.
Understanding Safety Precautions
Safety is critical when changing a table saw blade. Follow these steps carefully:
-
Disconnect Power: Unplug the saw from the wall or remove the battery for cordless models.
-
Wear Protective Gloves: Prevent cuts from sharp teeth.
-
Clear the Work Area: Remove wood, tools, and debris from the table.
-
Use Spindle Lock or Block of Wood: Keeps the blade from spinning while loosening the nut.
-
Avoid Touching Blade Teeth Directly: Handle by the center hole.
These precautions prevent accidents and ensure the process is safe.
Step-by-Step Guide to Change the Blade
Step 1: Remove the Blade Guard and Throat Plate
The blade guard and throat plate cover the blade and provide safety during cutting. Removing them gives access to the blade.
-
Unscrew the throat plate using a screwdriver if necessary.
-
Lift the blade guard carefully.
-
Set these components aside in a safe place.
-
Inspect the guard for damage or debris while removed.
Step 2: Engage the Spindle Lock
Most Ryobi table saws have a spindle lock that prevents the blade from turning.
-
Press the spindle lock button near the arbor.
-
Hold it while loosening the arbor nut.
-
If your model lacks a spindle lock, place a block of wood between the blade and the throat plate to hold it in place.
The spindle lock makes loosening the arbor nut much safer and easier.
Step 3: Loosen the Arbor Nut
The arbor nut secures the blade to the saw.
-
Use the supplied blade wrench to turn the nut counterclockwise.
-
Apply firm pressure to prevent the wrench from slipping.
-
Remove the nut and washer carefully.
Set the nut and washer aside for reinstallation.
Step 4: Remove the Old Blade
-
Carefully lift the blade straight off the arbor.
-
Hold it by the center hole, avoiding the sharp teeth.
-
Inspect the arbor for dust, debris, or buildup. Clean it with a brush or cloth before installing the new blade.
Step 5: Install the New Blade
-
Place the new blade on the arbor.
-
Ensure the teeth face the correct cutting direction (toward the front of the saw).
-
Confirm the blade sits flat against the washer for stability.
Correct installation ensures smooth and accurate cuts.
Step 6: Tighten the Arbor Nut
-
Replace the washer and nut.
-
Turn clockwise to secure the blade.
-
Hold the spindle lock or block of wood in place while tightening.
-
Tighten firmly, but avoid over-tightening, which can damage threads.
Step 7: Reinstall Blade Guard and Throat Plate
-
Place the blade guard back over the blade.
-
Reinstall the throat plate.
-
Secure all screws or clips.
-
Check for smooth movement of the guard.
Types of Ryobi Table Saw Blades
Different blades suit different materials and tasks. Choosing the right blade ensures better results.
| Blade Type | Best For | Teeth Count | Material |
|---|---|---|---|
| Rip Blade | Cutting along the wood grain | 24-30 | Wood |
| Crosscut Blade | Cutting across the wood grain | 60-80 | Wood |
| Combination Blade | Both rip and crosscut | 40-50 | Wood |
| Plywood Blade | Thin sheet wood | 60-80 | Plywood |
| Metal Cutting Blade | Thin metal sheets | 80-100 | Aluminum, thin steel |
| Dado Blade | Grooves and joints | Special set | Wood |
Understanding blade types helps avoid mistakes and improves cutting quality.
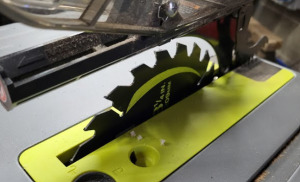
Tips for Better Blade Installation and Performance
-
Inspect the new blade before installing.
-
Clean the arbor regularly to prevent debris buildup.
-
Rotate blades occasionally for even wear.
-
Store extra blades safely to prevent damage.
-
Test new blades on scrap wood before starting a project.
Common Mistakes to Avoid
-
Over-tightening the Nut – Can damage threads and make removal hard.
-
Installing Blade Backward – Leads to poor cuts and safety issues.
-
Not Disconnecting Power – Risk of accidental start.
-
Touching Teeth Directly – Risk of cuts.
-
Using Dull Blades – Reduces cutting efficiency and increases kickback.
Troubleshooting Blade Issues
-
Blade Wobble: Check arbor cleanliness and correct nut tightness.
-
Poor Cuts: Ensure blade type matches material.
-
Excessive Vibration: Inspect blade for warping or damage.
-
Kickback: Keep blade sharp and use proper cutting technique.
Maintenance Tips for Longer Blade Life
-
Clean after each use.
-
Inspect for dull or damaged teeth.
-
Keep blades dry to prevent rust.
-
Use a blade guard for storage.
-
Sharpen or replace dull blades promptly.
FAQs
1. How often should I change the blade?
Replace it when cuts become rough or teeth are dull or chipped.
2. Can I use any brand of blade?
Yes, as long as it matches the arbor size and tooth type recommended.
3. Do I need to remove the blade guard?
Yes, to access the blade safely.
4. How do I know the blade direction?
Teeth face the front of the saw; some blades have arrows showing rotation.
5. Can I use gloves while tightening the blade?
Yes. They protect your hands from sharp teeth.
6. What if the arbor nut is hard to loosen?
Use spindle lock or block of wood and apply steady pressure.
7. Is cleaning the arbor necessary?
Yes, dust can cause blade wobble or uneven cuts.
8. Can I use a dull blade temporarily?
No. Dull blades increase kickback risk and produce rough cuts.
9. Can I install a thicker blade than recommended?
No. Only use blades compatible with your table saw.
10. How can I prevent kickback after changing the blade?
Keep blade sharp, use proper feed rate, and maintain clean wood surface.
Conclusion
Changing the blade on a Ryobi table saw is simple if you follow the proper steps. Safety comes first. Unplug the saw, wear gloves, and follow each step carefully.
Choosing the right blade type, inspecting it, and installing it correctly ensures smooth cuts, reduces kickback risk, and improves overall woodworking results. Regular blade maintenance keeps your table saw performing efficiently and extends its lifespan.
With this complete guide, even beginners can confidently change their Ryobi table saw blade and maintain their tools for safe, clean, and precise cuts.


