How To Remove A Drill Bit From A Dewalt Drill
A DeWalt drill serves many purposes. Home users rely on it for repairs. Students use it for small projects. Workers depend on it for daily tasks. This tool drills holes fast and drives screws with strong force. One small action causes trouble for many users. Drill bit removal.
A drill bit may feel locked in place. The chuck may not turn. Hands may slip during attempts. Frustration grows quickly. This problem does not mean the drill is broken. Simple reasons cause this issue. Heat, dust, tight pressure, or rust often create the problem.
Clear steps solve the issue. Calm actions protect hands and tools. Knowledge removes stress. A few minutes of learning save time later.
This guide explains every detail. Each step uses simple words. Sentences stay short. Instructions remain clear. All DeWalt drill types receive coverage. Cordless drills. Corded drills. Keyless chucks. Keyed chucks. Beginners and regular users both gain value.
How a DeWalt Drill Holds a Drill Bit
A DeWalt drill uses a chuck to grip the drill bit. The chuck sits at the front of the drill body. Metal jaws inside the chuck close around the bit. These jaws move together or apart based on chuck rotation.
Turning the chuck clockwise tightens the jaws. Turning the chuck counterclockwise opens the jaws. Tight jaws keep the bit stable during drilling. Stable grip prevents wobble and uneven holes.
Problems start when the jaws grip too tightly. Heat expands metal. Dust fills small gaps. Rust increases friction. Understanding this grip system helps users remove bits without force.
Better understanding leads to better control.
Types of DeWalt Drill Chucks

DeWalt drills use two main chuck designs. Each design works well but needs a different approach.
Keyless Chuck
A keyless chuck tightens and loosens by hand. This chuck appears on most modern DeWalt drills. Cordless models almost always use this design.
Hand rotation controls jaw movement. Reverse mode helps loosen tight bits. This system allows quick bit changes.
Ease of use makes this chuck popular.
Keyed Chuck
A keyed chuck uses a small metal key. The key fits into holes around the chuck. Turning the key moves the jaws inward or outward.
This design holds bits very tightly. Heavy drilling tasks benefit from this grip. Extra steps slow bit changes slightly.
Knowing the chuck type saves effort and time.
Safety Steps Before Removing a Drill Bit

Safety matters before touching any power tool. Drill bits cut skin easily. Sharp edges cause injury. Rotating drills increase risk.
Disconnect the Power Source
Cordless drills need battery removal. Corded drills need unplugging from the outlet. This step stops all movement.
No power means no surprises.
Allow the Bit to Cool
Drilling creates heat fast. Metal bits hold heat longer. Hot bits burn skin quickly.
A short pause prevents injury.
Secure the Drill Body
Hold the drill firmly with one hand. Place it on a stable surface if needed. Stability improves control during removal.
Keep Hands Clean and Dry
Dry hands grip better. Oil or sweat causes slipping. A clean cloth helps.
These steps prepare a safe work area.
How To Remove a Drill Bit From a DeWalt Drill With a Keyless Chuck

Keyless chucks appear on most DeWalt drills. This method works for daily use.
Step 1: Set the Drill Direction to Reverse
A small switch near the trigger controls direction. Slide the switch to reverse. Reverse mode opens the chuck jaws.
Forward mode tightens the jaws further. Direction choice matters.
Step 2: Grip the Chuck Firmly
Hold the chuck close to the jaws. Fingers should stay clear of the sharp bit tip. A firm grip prevents slipping.
Comfort improves control.
Step 3: Pull the Trigger Slowly
Gently squeeze the trigger. Slow speed allows control. Fast speed causes hand slip.
The chuck turns against your grip and loosens.
Step 4: Open the Jaws Fully
Continue turning until the jaws spread wide. Space appears around the bit.
Step 5: Remove the Drill Bit
Pull the bit straight out. Place it on a flat surface.
Practice makes this process quick and smooth.
How To Remove a Drill Bit From a DeWalt Drill With a Keyed Chuck
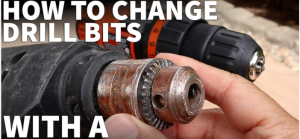
Keyed chucks need patience and even pressure.
Step 1: Locate the Chuck Key
The key often clips onto the cord or case. Teeth on the key match the chuck gears.
Keep the key nearby to avoid delays.
Step 2: Insert the Key Fully
Place the key into one hole on the chuck. Push firmly so it seats well.
A loose fit causes slipping.
Step 3: Turn the Key Counterclockwise
Turn slowly and steadily. The jaws begin to open. Move the key to another hole and repeat.
Even pressure protects the chuck.
Step 4: Open the Jaws Completely
Continue until the jaws open wide.
Step 5: Remove the Drill Bit
Pull the bit straight out. Store the key safely.
Why Drill Bits Get Stuck in DeWalt Drills

Stuck bits frustrate many users. Several common causes exist.
Heat Expansion
Heat causes metal to expand. A hot bit presses harder against the jaws.
Cooling reduces grip pressure.
Over-Tightening
Power tightening locks jaws too tight. Hand tightening provides enough grip.
Less force prevents problems.
Dust and Debris
Fine dust collects inside the chuck. Dirt blocks smooth jaw movement.
Cleaning solves this issue.
Rust and Moisture
Moisture causes rust. Rust grips metal tightly.
Dry storage prevents rust buildup.
How To Remove a Stuck Drill Bit From a DeWalt Drill
Stuck bits need calm handling.
Method 1: Reverse Mode With Steady Grip
Switch to reverse. Hold the chuck tightly. Pull the trigger slowly.
Steady pressure often releases the bit.
Method 2: Gentle Tapping
Light taps help loosen tight parts. Use a rubber mallet or wooden block.
Tap around the chuck gently.
Method 3: Penetrating Oil
A drop of oil loosens rust. Apply to the jaws. Wait a few minutes.
Try again slowly.
Method 4: Strap Wrench Use
A strap wrench improves grip without damage. Turn slowly and evenly.
Patience works better than force.
How To Remove a Broken Drill Bit From a DeWalt Drill
Broken bits create sharp edges. Care matters.
Step 1: Disconnect Power
Battery removal or unplugging ensures safety.
Step 2: Open the Chuck Fully
Expose the broken piece.
Step 3: Grip With Needle-Nose Pliers
Pull the broken bit straight out. Keep fingers away from sharp edges.
Step 4: Clean the Chuck Area
Remove metal fragments. Wipe clean with a cloth.
Broken bits often result from dull edges or heavy pressure.
Common Mistakes to Avoid
Mistakes cause damage and injury.
-
Using pliers on the chuck
-
Pulling the trigger too fast
-
Forgetting reverse mode
-
Touching hot bits
-
Misplacing the chuck key
Awareness prevents these issues.
How To Prevent Drill Bits From Getting Stuck

Good habits protect tools.
Hand Tightening Only
Hand pressure holds bits securely without stress.
Regular Chuck Cleaning
Clean jaws move freely.
Cooling Time After Use
Cooling prevents expansion.
Dry Tool Storage
Dry storage prevents rust.
Correct Bit Selection
Correct bits reduce heat and wear.
Small habits extend tool life.
Corded vs Cordless DeWalt Drills
Both drill types remove bits the same way.
Cordless Drills
Battery removal improves safety. Lighter weight helps control.
Corded Drills
Unplugging remains essential. Strong torque tightens jaws more.
Removal steps remain identical.
How Often To Check Drill Bits
Regular checks reduce problems.
-
After long drilling sessions
-
After metal drilling
-
Before tool storage
Routine checks save time later.
Signs the Chuck Needs Cleaning or Repair
Watch for warning signs.
-
Stiff jaw movement
-
Grinding sounds
-
Visible rust
-
Uneven jaw opening
Early care prevents larger issues.
How To Clean a DeWalt Drill Chuck
Cleaning takes little time.
-
Open the chuck fully
-
Brush away dust
-
Apply one drop of light oil
-
Rotate jaws several times
Clean tools perform better.
How To Store Drill Bits Properly
Storage matters for long life.
-
Use a bit case
-
Keep bits dry
-
Wipe after use
-
Separate wood and metal bits
Good storage prevents rust and damage.
Extra Tips for Beginners
New users gain confidence with practice.
-
Practice bit removal before work
-
Work slowly
-
Stay focused
-
Respect tool limits
Experience builds skill over time.
FAQs
How do I know which chuck my DeWalt drill uses?
Most modern models use a keyless chuck. Older or heavy-duty models often use a keyed chuck.
Why does the drill bit stay stuck?
Heat, dirt, rust, or over-tightening usually cause the issue.
Can oil damage the chuck?
Light oil helps when used sparingly. Excess oil attracts dust.
What helps with heavy rust?
Penetrating oil and patience work best.
Should tools grip the chuck?
Hands work best. Tools may scratch or damage metal.
How tight should a drill bit feel?
Firm hand-tight pressure provides enough grip.
Final Thoughts
Removing a drill bit from a DeWalt drill feels difficult only when the steps feel unclear. Clear knowledge changes that feeling. Understanding how the chuck works makes the process smooth and predictable.
Each drill holds the bit using simple jaw pressure. Once you respect that system, removal becomes easy and controlled. Good habits matter more than strength. Slow trigger use gives better control. Hand tightening prevents future problems.
Cooling time protects fingers and reduces jaw pressure. Regular cleaning keeps the chuck moving freely and prevents dust buildup. Small actions like these protect the drill and extend its working life.
Patience also plays a big role. Rushing causes slipping and damage. Calm movements protect hands and prevent tool wear. Even a stuck or broken bit can come out safely with the right approach. No force. No panic. Just steady steps.
Practice builds confidence. Each successful removal improves skill and comfort. Over time, this task becomes automatic and stress-free. A well-maintained DeWalt drill stays reliable, safe, and ready for work. Proper bit removal supports better results on every project, from small repairs to regular daily use.