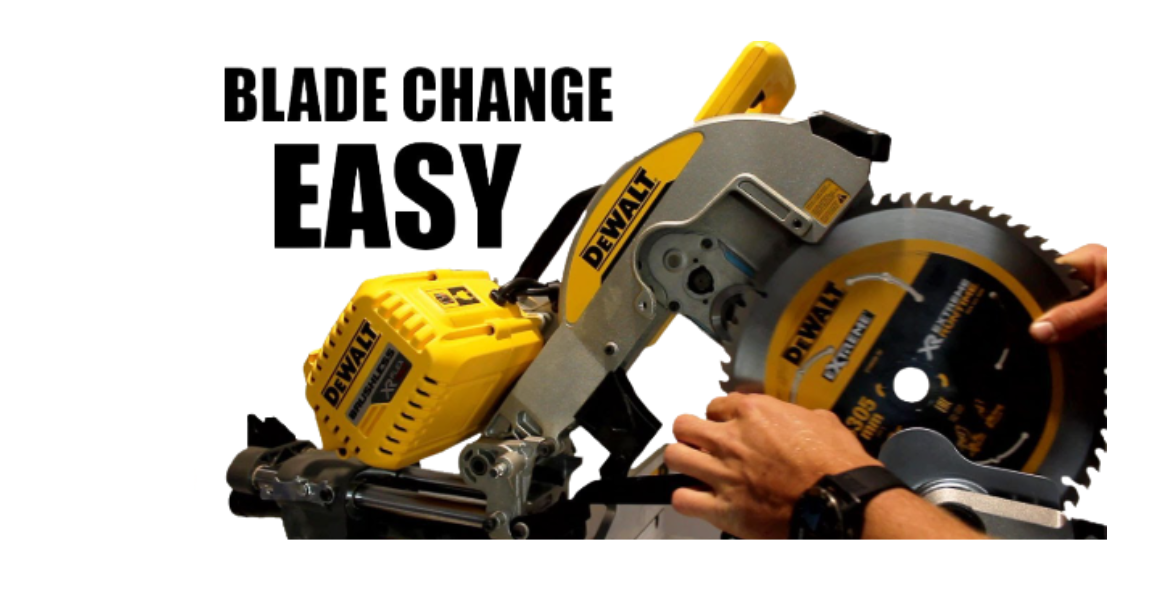
How to Change Blade on DeWalt Chop Saw?
A DeWalt chop saw plays an important role in many workspaces. Home users depend on it for repair tasks. Workshop users rely on it for metal cutting. Construction workers use it for daily jobs. This tool delivers straight cuts with speed and control.
Blade condition affects everything. A sharp blade cuts smoothly. A dull blade slows work. Sparks increase. Cuts look rough. The motor works harder than needed. Safety risks rise with poor blade condition.
Many users feel nervous about blade changes. Sharp edges cause fear. Heavy parts feel risky. Wrong steps may damage the saw. These worries make people delay blade replacement.
Clear guidance removes this fear. Step-by-step understanding builds confidence. Calm actions protect hands and tools. This guide explains the full process using simple words and clear structure. Beginners and regular users both benefit.
Understanding a DeWalt Chop Saw Design
A DeWalt chop saw uses a strong motor to spin a circular blade. The blade spins at high speed to cut metal or other materials. A hinged arm lowers the blade onto the workpiece. A base holds the material steady.
A blade guard covers the blade during rest. This guard lifts during cutting and lowers afterward. The arbor sits at the center of the blade. A nut and washer secure the blade in place.
This design keeps the blade stable during cutting. Blade replacement requires respect for this structure. Correct steps protect the saw and user.
Types of Blades Used on DeWalt Chop Saws
Blade type matters more than many users realize. Each blade serves a specific purpose.
Abrasive Cutting Wheels
Abrasive wheels grind through metal. Sparks appear during use. These wheels wear down with every cut. Diameter reduces over time.
These blades cost less. Noise levels stay higher. Cutting speed feels slower.
Carbide-Tipped Blades
Carbide blades use sharp teeth. Cuts stay clean and fast. Sparks reduce greatly. Noise stays lower.
These blades last longer but need careful handling. Teeth break if dropped.
Specialty Material Blades
Some blades cut aluminum or thin steel. These blades reduce clogging and vibration.
Using the correct blade improves safety and performance.
Tools Needed to Change a DeWalt Chop Saw Blade
Most blade changes require simple tools.
-
Wrench or spanner
-
Allen key on some models
-
Gloves for grip
-
Clean cloth
Many DeWalt saws store the wrench onboard. Check the rear or side of the saw body.
Using correct tools prevents damage.
Safety Steps Before Changing the Blade
Safety steps protect hands, eyes, and the saw.
Disconnect the Power Source
Unplug the saw completely. Power removal prevents accidental startup.
Allow the Blade to Cool Fully
Recently used blades stay hot. Heat burns skin fast. Cooling protects fingers.
Wear Protective Equipment
Gloves improve grip and reduce cuts. Eye protection guards against debris.
Clear the Work Area
Remove loose items. Stable footing improves balance.
Preparation reduces risk.
How to Lock the Blade on a DeWalt Chop Saw
Blade locking stops rotation during removal.
Most DeWalt chop saws include a spindle lock button. This button sits near the blade housing.
Press and hold the button. Rotate the blade slowly by hand. The lock engages and stops movement.
This step makes nut removal safe and controlled.
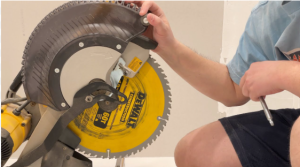
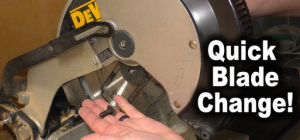
How to Remove the Old Blade from a DeWalt Chop Saw
Step 1: Lift the Blade Guard
Raise the guard carefully. Expose the arbor nut and washer.
Step 2: Engage the Spindle Lock
Press the lock firmly. Rotate the blade until it locks in place.
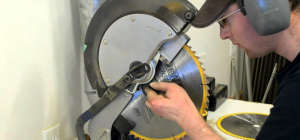
Step 3: Loosen the Arbor Nut
Use the wrench to turn the nut. Turn slowly and steadily.
Steady pressure works better than force.
Step 4: Remove Nut and Washer
Place these parts in a safe spot. Losing small parts causes delays.
Step 5: Slide the Blade Off the Arbor
Hold the blade by the center. Avoid sharp edges. Pull straight outward.
Handle with care.
Inspecting the Old Blade and Arbor Area
Inspection prevents future issues.
Examine the Blade Condition
Look for cracks, uneven wear, or missing teeth. Damage explains poor cuts.
Clean the Arbor and Flanges
Dust and debris collect here. A clean cloth removes buildup.
Check the Guard Movement
The guard should move freely. Smooth motion supports safety.
Clean parts improve tool life.
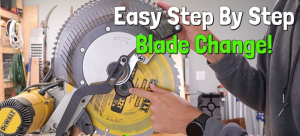
How to Install a New Blade on a DeWalt Chop Saw

Step 1: Confirm Blade Direction
Arrows printed on the blade show rotation direction. Match this arrow with the saw direction. Wrong direction causes poor cutting.
Step 2: Place the Blade on the Arbor
Align the center hole. Slide the blade fully against the inner flange.
Step 3: Install Washer and Nut
Return parts in the same order as removal.
Step 4: Tighten the Arbor Nut
Press the spindle lock. Tighten the nut firmly. Avoid excess force.
Step 5: Lower the Blade Guard
Confirm full coverage of the blade.
Correct installation ensures smooth operation.
Checking Blade Alignment After Installation
Alignment affects safety and accuracy.
Spin the blade by hand. Watch for wobble or rubbing. Smooth rotation shows correct placement.
Correct issues before plugging in the saw.
First Test Run After Blade Change
Testing ensures safe operation.
Plug the saw back in. Stand to the side. Turn the saw on briefly.
Listen for unusual noise. Watch blade movement.
Turn the saw off and recheck if anything feels wrong.
Common Mistakes During Blade Changes
Mistakes often cause damage.
-
Forgetting to unplug the saw
-
Installing the blade backward
-
Over-tightening the arbor nut
-
Skipping alignment checks
-
Touching sharp teeth
Awareness prevents injury.
Why a Chop Saw Blade Feels Hard to Remove
Several reasons cause resistance.
Heat Expansion
Heat expands metal. The blade grips tighter on the arbor.
Rust and Dirt
Moisture causes rust. Dirt increases friction.
Excessive Tightening
Over-tightening locks the nut firmly.
Understanding the cause helps solve the issue.
How to Remove a Stuck DeWalt Chop Saw Blade
Apply Steady Pressure
Slow pressure breaks tight bonds.
Use Penetrating Oil
A small drop loosens rust. Wait a few minutes.
Light Tapping on the Wrench
Gentle taps help release tension.
Avoid aggressive force.
How Often to Change a Chop Saw Blade
Blade life varies.
-
Heavy daily use shortens life
-
Thick metal increases wear
-
Excess heat reduces durability
Signs of a worn blade include slow cutting, rough edges, and increased sparks.
Replacing early improves safety.
Blade Care Tips for Longer Life
Good care saves money.
Use Proper Cutting Pressure
Let the blade do the work.
Avoid Side Pressure
Straight cuts reduce stress.
Store Blades Correctly
Dry storage prevents rust.
Clean After Each Use
Dust removal keeps blades sharp.
Simple care extends blade life.
Abrasive Blade vs Carbide Blade Change Differences
The process stays similar.
Abrasive wheels feel thinner and lighter. Carbide blades feel heavier with sharp teeth.
Extra care prevents tooth damage on carbide blades.
Extra Tips for Beginners
Beginners benefit from patience.
-
Read the saw markings
-
Follow blade arrows
-
Move slowly
-
Keep hands away from edges
Confidence grows with repetition.
FAQs
How do I know the correct blade size?
Check the blade size printed on the saw or old blade.
Can I change the blade without gloves?
Gloves improve grip and reduce injury risk.
Why does my saw spark more after blade change?
Wrong blade type or backward installation often causes sparks.
How tight should the arbor nut feel?
Firm and secure without excess force works best.
Can I sharpen chop saw blades?
Carbide blades allow sharpening by professionals. Abrasive wheels do not.
How long does a blade change take?
A careful blade change usually takes ten to fifteen minutes.
Final Thoughts
Changing the blade on a DeWalt chop saw becomes much easier once the steps feel clear and familiar. The process does not depend on strength. Care and attention matter more.
Power disconnection keeps the work safe from the start. Blade locking gives control during removal. These small actions reduce risk and prevent sudden movement.
Blade direction and proper tightening also play a key role. A correctly installed blade cuts smoother and lasts longer. The saw runs with less vibration and less noise. The motor works with less strain. Better cutting results appear with every use. These benefits show the value of proper blade changes.
Regular blade checks support long-term performance. Dull or damaged blades slow work and raise safety risks. Early replacement saves time and reduces stress during cutting. Cleaning the arbor and guard after each change keeps parts moving freely and prevents future problems.
Confidence grows with practice. Each blade change improves comfort and control. Over time, the task becomes routine and stress-free. A well-maintained DeWalt chop saw stays reliable for many projects. Careful blade handling supports safer work, cleaner cuts, and steady results day after day.