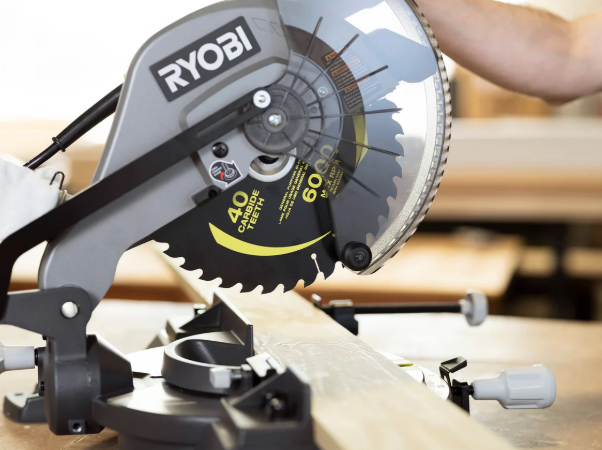
How to Change Blade on Ryobi Miter Saw
Every cut begins with a sharp blade. A dull one tears through wood, burns edges, and makes rough finishes. Your Ryobi miter saw can only perform its best with a clean, sharp blade. Over time, even the best blades wear out. Replacing them keeps your saw cutting fast, smooth, and accurate.
Changing a blade might sound tricky at first, but it’s a simple process once you know the steps. It only takes a few minutes, and you don’t need any special tools.
This guide walks you through everything — from safety checks to installing the new blade — in clear, simple steps anyone can follow.
Why Blade Replacement Matters
A fresh blade makes a huge difference in your work. Dull blades don’t just slow you down; they can make your saw unsafe.
Here’s why replacing the blade matters:
-
Cleaner Cuts: Sharp blades slice wood fibers instead of tearing them.
-
Faster Work: Less effort, smoother motion, and faster completion.
-
Less Heat: Dull blades create friction, which can burn wood or damage the motor.
-
Better Accuracy: A new blade keeps your miter angles true and edges straight.
It’s not only about looks — it’s about safety and performance.
Tools You’ll Need
Changing a blade doesn’t take much. Gather these before starting:
-
Wrench or hex key: Usually included with your saw.
-
New saw blade: Match the same size and arbor hole as your current one.
-
Gloves: Protect your hands from sharp teeth.
-
Safety glasses: Shield your eyes from dust and small metal parts.
Set up your workspace on a flat, clean surface with good lighting.
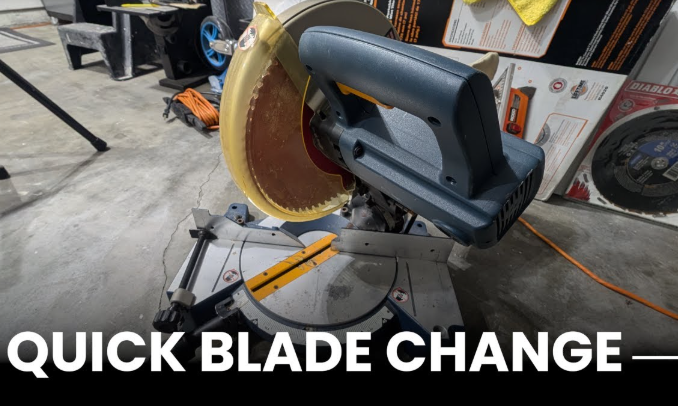
Step-by-Step: How to Change Blade on Ryobi Miter Saw
Step 1: Disconnect the Power
Unplug the saw if it’s corded. If it’s a cordless model, remove the battery.
This is the most important step. Never handle a blade with power connected. Even a small accidental press on the trigger can cause injury.
Step 2: Raise the Saw Arm
Lift the saw arm to its highest position. This gives you more room to work. Some Ryobi models have a locking pin that holds the arm in place — push it in to secure the arm so it doesn’t move while you work.
Step 3: Move the Blade Guard
Locate the blade guard screw near the hinge area. Loosen it just enough so you can lift the clear guard upward. You don’t need to remove it completely — just move it aside to access the bolt and washer in the center of the blade.
Keep the guard open carefully with one hand or use a small object to hold it in place.
Step 4: Lock the Spindle
The spindle lock keeps the blade from spinning while you loosen the bolt. Look near the blade’s center for a small round button. Press and hold it firmly.
You’ll feel it click into place as it locks the blade.
Step 5: Loosen the Arbor Bolt
Use your wrench or hex key to loosen the arbor bolt in the center of the blade.
Most Ryobi miter saws use a reverse-thread bolt, which means:
-
Turn clockwise to loosen.
-
Turn counterclockwise to tighten.
This design prevents the bolt from loosening during cutting. Apply steady pressure until the bolt comes free.
Remove both the bolt and the outer washer, but keep them close — you’ll need them again.
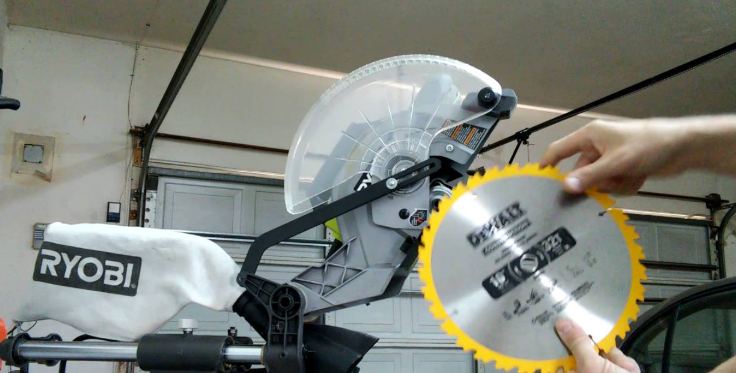
Step 6: Remove the Old Blade
Slide the old blade gently off the arbor shaft. Hold it by the flat sides, not the sharp edges.
Check the arbor and the inside of the guard for sawdust or debris. A small buildup can affect how smoothly the new blade sits. Wipe it clean with a dry cloth.
Step 7: Inspect the New Blade
Before installing, check your new blade carefully. Make sure:
-
It’s clean and undamaged.
-
The teeth face the correct direction.
-
The size and arbor hole match your old blade.
You can find the direction arrow printed on the blade. It must match the rotation arrow on your saw’s guard.
Step 8: Install the New Blade
Slide the new blade onto the arbor shaft. Make sure it sits flat and secure against the inner washer.
Once positioned, replace the outer washer and thread the arbor bolt back into place.
Step 9: Tighten the Arbor Bolt
Press the spindle lock again. While holding it, turn the arbor bolt counterclockwise to tighten.
Don’t use excessive force. Snug is enough. Over-tightening can strip the threads or damage the washers.
Step 10: Reposition the Blade Guard
Lower the blade guard back into position. Tighten the hinge screw so the guard moves freely but doesn’t hang loose. It should lower automatically when you release it.
Step 11: Reconnect Power and Test
Plug the saw back in or reinsert the battery. Hold the saw clear of any wood and squeeze the trigger briefly.
The blade should spin smoothly without wobbling or vibration.
If everything sounds normal, you’re ready to cut again.
How to Know When It’s Time to Change the Blade
Not sure if you need a new blade yet? Watch for these signs:
-
Cuts take longer than usual.
-
The saw burns or smokes while cutting.
-
Edges look rough or splintered.
-
You hear squealing or vibration.
-
The blade looks dirty, chipped, or dull.
If you notice two or more of these signs, it’s time for a replacement.
Types of Blades for Ryobi Miter Saws
Not all blades are the same. Choosing the right one improves your cuts and extends the saw’s life.
Crosscut Blades
Ideal for cutting across the wood grain. They usually have 60–80 teeth and create smooth, fine edges. Perfect for trim, molding, and furniture work.
Ripping Blades
Used for cutting along the grain. They have 24–40 teeth and remove wood faster but leave rougher edges. Great for framing or rough carpentry.
Combination Blades
A mix of crosscut and ripping features. These have around 50 teeth and are good for general use when you don’t want to switch blades often.
Fine Finish Blades
Made for extra-smooth cuts. These have 80–100 teeth and work best on delicate materials like laminate or thin hardwood.
Carbide-Tipped Blades
Stronger and longer-lasting than standard steel blades. They stay sharp longer and cut cleaner through thick hardwood or composite materials.
Choose a blade based on what you cut most often.
Safety Tips During Blade Changes
-
Always disconnect power before touching the blade.
-
Handle the blade by the edges only.
-
Use gloves to avoid cuts.
-
Keep fingers clear of the blade teeth and arbor.
-
Make sure the guard moves freely before turning the saw on.
-
Never use a bent or cracked blade.
Safety saves time — and fingers.
Common Mistakes to Avoid
1. Forgetting to Unplug the Saw
A simple mistake that can cause serious harm. Always check power first.
2. Installing the Blade Backward
Check both arrows — one on the blade, one on the guard. They must point the same way.
3. Over-Tightening the Bolt
Tight is enough. Forcing the bolt can damage threads or washers.
4. Skipping the Test Spin
Always test the blade after installation. A quick check prevents accidents.
5. Ignoring the Blade Guard
Never use the saw without the guard in place. It protects you from debris and kickback.
FAQs
Q1: What size blade does a Ryobi miter saw use?
Most Ryobi miter saws use 10-inch or 12-inch blades. Check your model number to confirm before buying.
Q2: How often should I replace the blade?
With regular use, change the blade every 3 to 6 months. Heavy cutting or hard materials may require more frequent changes.
Q3: Can I sharpen the old blade instead of replacing it?
Yes, if the blade is in good shape. A local sharpening service can restore it. But if it’s chipped or warped, replace it.
Q4: Can I use other brand blades on my Ryobi saw?
Yes, as long as the size and arbor hole match your saw’s specifications.
Q5: How do I clean a dirty blade?
Soak it in warm, soapy water for a few minutes and scrub gently with a soft brush. Dry it completely before reinstalling.
Q6: Why does my blade wobble after replacement?
The washer may not be seated properly, or the bolt isn’t tight enough. Recheck both and test again.
Conclusion
Changing the blade on a Ryobi miter saw is a simple task that keeps your tool sharp, fast, and safe. It only takes a few minutes to do it right.
Remember the key steps:
Unplug the saw, raise the guard, lock the spindle, remove the old blade, install the new one, tighten the bolt, and test the spin.
A clean, sharp blade doesn’t just improve performance — it makes your work safer and more professional. Take care of your saw, and it will take care of every cut you make.