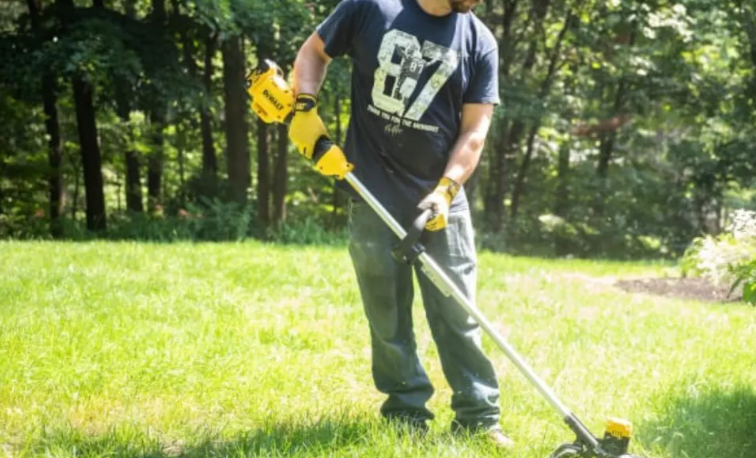
How to Restring a Ryobi Weed Wacker – Simple Step-by-Step Guide
A Ryobi weed wacker, also known as a string trimmer, keeps lawns neat and tidy by cutting grass and weeds along edges and fences. Over time, the trimmer line wears out or breaks. Replacing the string might look confusing at first, but it’s actually simple once you know the right steps.
This guide explains how to restring a Ryobi weed wacker easily. You’ll learn how to remove the old line, load new string, and wind it correctly. The language is simple so anyone can follow along without trouble.
Understanding the Ryobi Weed Wacker
A Ryobi weed wacker cuts grass using a spinning nylon line instead of a blade. The line sits in a spool inside the trimmer head. As the trimmer spins, the string whips through weeds and grass.
After some use, the line gets shorter or breaks. You must replace it to keep the trimmer cutting smoothly. Some models use a single-line spool, while others use a dual-line spool. The steps below work for most Ryobi 18V, 24V, and 40V string trimmers.
What You’ll Need
-
Replacement trimmer line (usually 0.080-inch or 0.095-inch diameter)
-
Scissors or wire cutters
-
Clean cloth (optional, for cleaning the head)
Always check your trimmer’s manual for the correct line size. Using the wrong size can cause poor performance or damage the spool.
Step-by-Step Guide: How to Restring a Ryobi Weed Wacker
Step 1: Turn Off the Trimmer
Unplug the trimmer or remove the battery. This step keeps you safe from accidental starts while working on the spool.
Step 2: Remove the Spool Cap
Place the trimmer upside down so the head faces upward. Press the tabs on both sides of the spool cap to release it. Pull the cap straight off. You’ll see the empty spool inside.
Set the cap aside where you can find it easily.
Step 3: Remove the Old Line
Take out any leftover string from the spool. Clean out grass, dirt, or small debris with a dry cloth. A clean spool helps the new line wind smoothly.
Step 4: Cut the New Trimmer Line
Cut about 15 to 25 feet of new trimmer line. The length depends on the model, but this range fits most Ryobi weed wackers.
Step 5: Find the Starter Hole
On the spool, you’ll see one or two small holes or notches labeled “START HERE.” Push one end of the line into one of these holes. About half an inch of the line should stick out on the other side.
Step 6: Wind the Line
Follow the direction arrows printed on the spool. These arrows show the correct way to wind the line.
Hold the line tight and start wrapping it evenly around the spool. Keep the wraps neat and tight, side by side, without crossing over. Leave about 6 inches of line free at the end. For dual-line spools, repeat the same process on the other side using another piece of line of equal length.
Step 7: Lock the Ends in Place
Once the line is wound, find the small notches on the edge of the spool. Slide the loose ends into these notches to hold them in place. This keeps the line from unraveling while you install the spool back into the head.
Step 8: Reattach the Spool to the Trimmer Head
Align the spool inside the trimmer head. Feed the line ends through the eyelets on the trimmer head. Press the spool down until it fits snugly.
Snap the cap back into place until it clicks. Tug lightly on both line ends to make sure they move freely.
Step 9: Test the Trimmer
Reattach the battery or plug the trimmer in. Turn it on for a few seconds. The line should spin evenly. If it’s too short, bump the trimmer head gently on the ground to release more line.
Now your Ryobi weed wacker is ready to trim again.
Tips for Better Results
-
Use only high-quality nylon line that matches your Ryobi model.
-
Avoid winding the line too tight or too loose. Both can cause tangles.
-
Always check the direction of the arrows on the spool before winding.
-
Replace both lines at the same time on dual-line models for balanced trimming.
-
Store spare trimmer line in a cool, dry place to prevent it from becoming brittle.
Common Mistakes to Avoid
-
Using the wrong line size — it can jam the trimmer.
-
Overfilling the spool — it may cause the line to pop out.
-
Ignoring cleaning — dirt buildup can block the line feed.
-
Forgetting safety — always remove the battery before handling the head.
Troubleshooting After Restringing
-
Line breaks quickly: The line may be old, brittle, or wound too tight. Replace with a fresh, flexible line.
-
Line does not advance: Check if the line ends are stuck inside the notches. Pull gently to release.
-
Trimmer vibrates too much: Lines may be uneven in length. Trim both ends to equal size.
-
No cutting power: Make sure the line is the right thickness and properly wound.
FAQs
Q1: What size line should I use for my Ryobi weed wacker?
Most Ryobi trimmers use 0.080-inch or 0.095-inch line. Check your trimmer’s manual for the exact size.
Q2: How often should I replace the trimmer line?
Replace it when the line becomes too short or breaks often. Regular users may need to restring every few weeks.
Q3: Can I use any brand of trimmer line?
Yes, but make sure the size and material match your Ryobi model for best results.
Q4: Why does my trimmer line melt together?
This happens when the line overheats from friction or incorrect winding. Keep the wraps loose and even.
Q5: Can I use a pre-wound Ryobi spool instead?
Yes. Pre-wound spools save time but cost more. You can still rewind your old one easily using this guide.
Conclusion
Restringing a Ryobi weed wacker sounds hard at first, but it’s actually a quick and easy task. A clean spool, the right line size, and careful winding make the difference between smooth cutting and constant jams. By following these steps, you can replace the string in minutes and keep your trimmer ready for yard work anytime.
A little care and regular maintenance go a long way. Clean the trimmer head often, check the line after each use, and use quality string. Your Ryobi weed wacker will stay sharp, efficient, and ready for the next trim.