How to Use Ryobi Drill?
A Ryobi drill is one of the most useful tools for home projects, repairs, and woodworking. It helps you drill holes, drive screws, and even mix paint or concrete with the right attachment. Many people find power drills intimidating, but once you understand the controls, using a Ryobi drill becomes simple and safe.
This guide explains everything in clear, simple steps — from setting up your Ryobi drill to using it for different jobs. You’ll also learn how to choose the right drill bit, adjust the settings, and keep your tool in good shape for a long time.
Understanding the Ryobi Drill

A Ryobi drill works with a motor that rotates a drill bit or driver bit. It’s available in both corded and cordless models. Cordless drills run on rechargeable batteries, while corded ones use direct power from an outlet.
Ryobi drills are known for being lightweight, strong, and easy to handle. They come with speed control, torque settings, and quick-change chucks that make drilling smooth and accurate.
Main Parts of a Ryobi Drill
Knowing each part helps you use the drill more effectively.
-
Trigger Switch: Controls the drill’s speed.
-
Direction Switch: Changes the rotation from forward (drilling or driving) to reverse (removing screws).
-
Chuck: Holds the drill bit or driver bit in place.
-
Torque Adjustment Ring: Controls how much twisting force the drill applies.
-
Speed Selector: Switches between low and high speeds.
-
Battery Pack or Cord: Provides power.
-
Grip Handle: Gives better control and comfort while drilling.
Every part plays a role in how the tool performs. Understanding them makes operation easier and safer.
Preparation Before Using the Ryobi Drill

A few small steps before drilling can prevent mistakes and improve accuracy. Preparation also protects the drill from damage.
Step 1: Inspect the Drill
Check the drill for cracks, loose parts, or worn-out wires. Make sure the battery is charged or the cord is in good condition.
Step 2: Select the Right Drill Bit
Choose a bit that matches your task.
-
Twist bits – for wood, metal, and plastic.
-
Masonry bits – for brick or concrete.
-
Driver bits – for driving screws.
Each bit has a different design for specific materials.
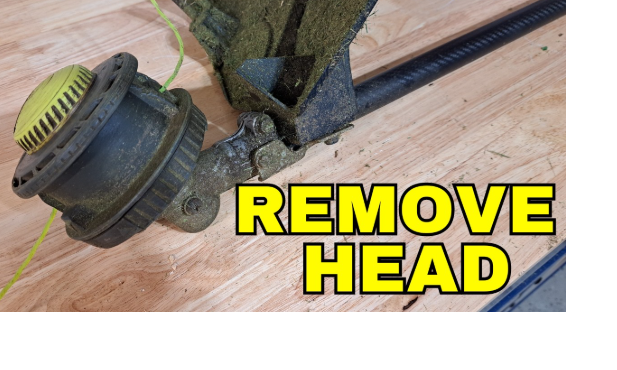
Step 3: Insert the Drill Bit
-
Hold the chuck firmly and rotate it counterclockwise to open the jaws.
-
Insert the drill bit straight into the center.
-
Turn the chuck clockwise until it grips the bit tightly.
-
Tug the bit gently to make sure it’s secure.
Some Ryobi drills have keyless chucks, so you can tighten the bit by hand without a tool.
Step 4: Set the Torque and Speed
Use the torque adjustment ring to control how much force the drill applies.
-
Low torque is best for small screws or soft materials.
-
High torque is better for hard materials or deep drilling.
Use the speed switch as well:
-
Low speed (1) for driving screws.
-
High speed (2) for drilling holes.
Step 5: Mark the Spot
Use a pencil or marker to make a small dot where you plan to drill. For smooth surfaces like tile or metal, make a small dent with a nail or punch so the bit doesn’t slip.
Step 6: Secure the Material
Clamp your workpiece to a solid surface. This keeps it from moving while you drill.
How to Use a Ryobi Drill Step by Step

Step 1: Wear Safety Gear
Put on safety glasses to protect your eyes from dust or debris. Use ear protection for long jobs, and wear gloves for better grip.
Step 2: Hold the Drill Properly
Use both hands for balance. Keep one hand on the grip and the other on the body of the drill if possible. Stand with your feet steady and your shoulders relaxed.
Step 3: Check Drill Direction
Set the forward/reverse switch to forward for drilling or inserting screws. Push it to reverse only when removing screws or backing out the bit.
Step 4: Start the Drill Slowly
Place the drill bit on your marked spot. Press the trigger lightly to start slow. Once the bit begins to bite into the surface, increase the speed gradually.
Step 5: Keep the Drill Straight
Hold the drill at a 90-degree angle to the surface for straight holes. Press gently and let the drill’s motor do the work. Forcing it can bend the bit or damage the surface.
Step 6: Drill Through
As you drill deeper, lift the bit slightly every few seconds to clear debris and prevent overheating. Continue until you reach the desired depth.
Step 7: Stop and Remove the Bit
Release the trigger to stop the drill completely. Then pull the bit out slowly while it’s still rotating slightly. This prevents it from getting stuck.
Step 8: Clean the Work Area
Brush away the dust and inspect the hole or screw placement.
Tips for Better Drilling Results

-
Keep the battery charged before each project.
-
Use sharp drill bits for cleaner holes.
-
Avoid pressing too hard on the surface.
-
Drill small pilot holes before using large bits.
-
Start at low speed for more control.
-
Store bits in a dry place to avoid rust.
Using the Ryobi Drill for Screws
Your drill can also act as a screwdriver.
-
Insert a driver bit into the chuck.
-
Set the torque to a lower number.
-
Place the screw on the tip of the bit.
-
Hold it straight and squeeze the trigger slowly.
-
Stop as soon as the screw head touches the surface.
This prevents stripping or overdriving the screw.
Drilling Different Materials
Wood
Use a standard twist bit or spade bit. Start slow to keep the wood from splintering.
Metal
Use a high-speed steel (HSS) bit. Apply light pressure and keep the speed moderate. You can also use a drop of oil to cool the bit.
Concrete or Brick
Use a masonry bit with a hammer drill setting if available. Go slow and pull out the bit often to clear dust.
Plastic
Use low speed and gentle pressure. Too much speed can melt the plastic.
Common Problems and Simple Fixes

Problem: Drill won’t start
Check the battery or power source. Make sure the trigger and direction switch work correctly.
Problem: Bit keeps slipping
Tighten the chuck more firmly or check for a worn-out bit.
Problem: Drill smells hot or smokes
Stop immediately. Let the motor cool down and clean the air vents. The bit may be dull or clogged.
Problem: Battery runs out fast
Recharge fully and avoid overloading the drill. Using too high torque drains power quickly.
Maintenance Tips for Longer Life
-
Wipe the drill with a dry cloth after use.
-
Keep vents free from dust.
-
Lubricate moving parts lightly once in a while.
-
Store the drill and batteries in a cool, dry place.
-
Remove the battery when not using the drill for long periods.
Regular care keeps your Ryobi drill strong and reliable for years.
FAQs
1. Can I use my Ryobi drill as a screwdriver?
Yes. Use a driver bit and set the torque to low for screw-driving tasks.
2. How long does a Ryobi battery last?
Most batteries last around 30–45 minutes per charge, depending on use and load.
3. What’s the best way to drill straight holes?
Keep the drill steady at a right angle to the surface and use a guide if possible.
4. Can I drill into concrete with a regular Ryobi drill?
Yes, but use a masonry bit and go slow. For thick concrete, use a hammer drill model.
5. How do I change a drill bit?
Twist the chuck counterclockwise to open it, insert the new bit, then tighten clockwise.
6. Why does the drill make a clicking sound?
That sound means the clutch is working. It prevents over-tightening of screws.
Conclusion
A Ryobi drill makes home and DIY tasks much easier once you understand how to use it properly. Start by choosing the right bit, setting the right torque, and marking your spot clearly. Always drill slowly at first and let the tool do the work.
Keep your drill clean, store it safely, and use sharp bits for the best results. Confidence grows with practice. Soon, you’ll handle every drilling or screw-driving job with precision and ease.