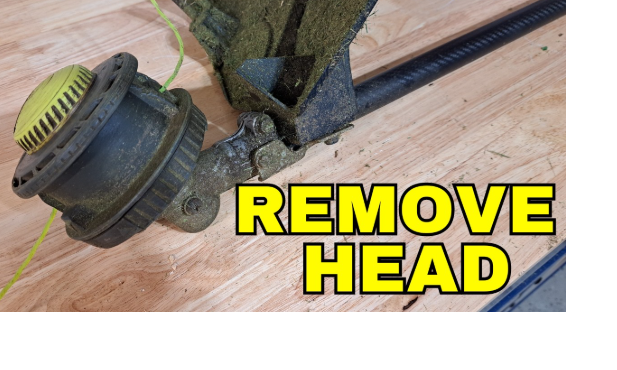
How to Remove Ryobi Trimmer Head?
A Ryobi trimmer is one of the most common tools for keeping lawns clean and edges sharp. Over time, the trimmer head can wear out, get jammed, or collect too much grass and debris.
This can cause poor cutting performance or strange vibrations while trimming. Removing the trimmer head might sound complicated, but it’s actually simple. You just need to follow a few steps carefully.
Doing this the right way helps you replace the head safely, extend your trimmer’s life, and keep your lawn looking neat. This guide explains every step in clear, easy words so anyone can do it at home — even without technical skills.
Understanding the Ryobi Trimmer Head

The trimmer head is the part that holds the nylon cutting line. It’s the working end of your trimmer. The head spins quickly to cut grass and weeds. Ryobi trimmers mainly use two types of heads: bump feed and auto feed.
-
Bump Feed Head: You tap it on the ground to release more line while trimming.
-
Auto Feed Head: It releases the line automatically when needed.
Knowing your trimmer type helps you follow the right removal steps. Both work on the same idea — the head attaches to the shaft and can be unscrewed when replacement or cleaning is needed.
Why You Might Need to Remove the Trimmer Head
Here are some common reasons to take it off:
-
The cutting line keeps getting tangled.
-
The bump knob or spring is damaged.
-
The trimmer makes noise or vibrates too much.
-
The head no longer feeds the line correctly.
-
You want to install a new or upgraded head.
Removing the head helps you fix these problems quickly instead of buying a new trimmer.
Tools You Might Need
Before you begin, prepare these tools to make the job easier:
-
A screwdriver or Allen wrench (for locking the shaft)
-
A pair of gloves to protect your hands
-
A clean cloth for wiping dirt
-
A wrench or pliers if your head is tightly screwed
-
A new trimmer head (if you plan to replace it)
Having these items ready saves time and helps prevent damage to the tool.
Step-by-Step Guide to Remove the Ryobi Trimmer Head

Step 1: Turn Off the Power
Always start by turning off your trimmer. For cordless models, remove the battery. For electric ones, unplug it. For gas trimmers, make sure the engine is completely off and cool. This keeps your hands safe from accidents.
Step 2: Find the Locking Hole
At the base of the trimmer head, you’ll see a small hole near where the shaft connects. This hole locks the shaft in place so the head doesn’t spin while you try to remove it.
Step 3: Insert a Rod or Screwdriver
Insert a small rod, Allen key, or screwdriver into the hole. Slowly rotate the head until the rod slips into the slot inside. You’ll feel it click into place. The head should stop spinning now.
Step 4: Loosen the Trimmer Head
Once the shaft is locked, hold the head firmly and twist it. Most Ryobi trimmer heads loosen counterclockwise. Keep turning until it starts to come off.
Important: A few models use reverse-threaded bolts. That means you’ll need to turn clockwise to loosen them. If your head feels stuck, check your user manual or model number online to confirm the correct direction.
Step 5: Remove the Head
Once loose, pull the head straight off the shaft. Keep the spring or washer if your model has one — you’ll need them when reattaching.
Step 6: Clean the Shaft
Use a clean cloth to wipe away any dirt, grass, or oil from the spindle area. A dirty shaft can cause new heads to wobble or loosen over time.
How to Reattach or Replace a New Head
-
Align the new head with the shaft.
-
Slide it into place.
-
Turn it in the correct direction to tighten.
-
Remove the locking rod.
-
Spin the head by hand to check that it moves freely.
Once everything is tight and aligned, your trimmer is ready to use again.
Extra Maintenance Tips
-
Clean the head regularly. Dirt buildup causes poor performance.
-
Use the right trimmer line. Check your manual for the correct thickness.
-
Inspect the spring and bump knob. Replace them if worn or cracked.
-
Store the trimmer properly. Keep it dry and upright to avoid rust.
Taking these small steps can make your Ryobi trimmer last much longer.
Common Problems and Solutions
Problem 1: The head won’t loosen.
Try adding a bit of lubricant around the threads. Wait a few minutes and try again with a wrench.
Problem 2: The shaft keeps spinning.
You may not have locked it properly. Make sure the rod is inserted fully into the lock hole.
Problem 3: The new head wobbles.
You may have missed a washer or spring. Recheck the assembly before tightening.
FAQs
1. Can I remove the Ryobi trimmer head by hand?
Yes, but it’s easier with a locking rod or screwdriver. It keeps the shaft from spinning while you twist the head off.
2. How often should I replace the trimmer head?
Usually every one to two years, depending on use. Replace it earlier if you notice cracks or poor performance.
3. Do all Ryobi trimmer heads fit every model?
No. Always check the model number before buying a new head to ensure proper fit.
4. What if the head feels stuck?
Spray a little lubricant and give it time to loosen. Don’t use too much force, or you might damage the shaft threads.
5. Can I clean and reuse the same head?
Yes. If the head isn’t damaged, just remove it, clean it well, and reinstall it.
Conclusion
Removing a Ryobi trimmer head doesn’t need special skills or tools. A few simple steps — turning off the trimmer, locking the shaft, and twisting the head — are all it takes. Always check your model for thread direction and keep your trimmer clean after each use.
A clean, well-maintained head helps your Ryobi trimmer perform better and last longer. Doing small maintenance tasks like this not only saves money but also makes yard work easier and faster. With a little care, your Ryobi trimmer will keep your lawn edges looking perfect every time you use it.


